Remote e-Paper Messages Panel
|
How to display messages on a remote screen? The project combines two technologies to solve this problem.
The Remote e-Paper Pictures Panel project brings an updated version based on MQTT, a non-proprietary protocol. |
|
|
The e-paper screens act like a sheet of paper: they only need power during the printing of the text or image. Once the text or image has been printed, the screens no longer need power. They can even be detached: the text or image stays on! A more detailed presentation explains How e-paper works.
Apart from the low power and the persistent display, the e-paper screens offer high readability even in direct sunlight and high resolution with 130 dpi. Particle pioneered IoT and offered a comprehensive IoT eco-system including hardware, the Photon board with a WiFi radio; software with the Particle device API; and service with the Particle cloud. |
|
Remote device
|
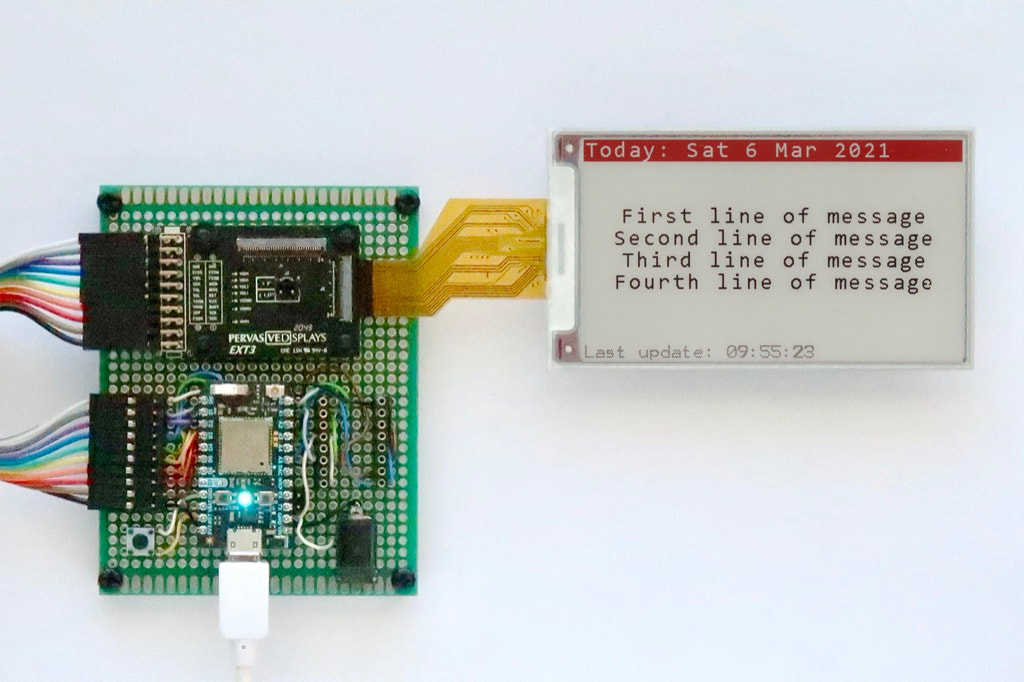
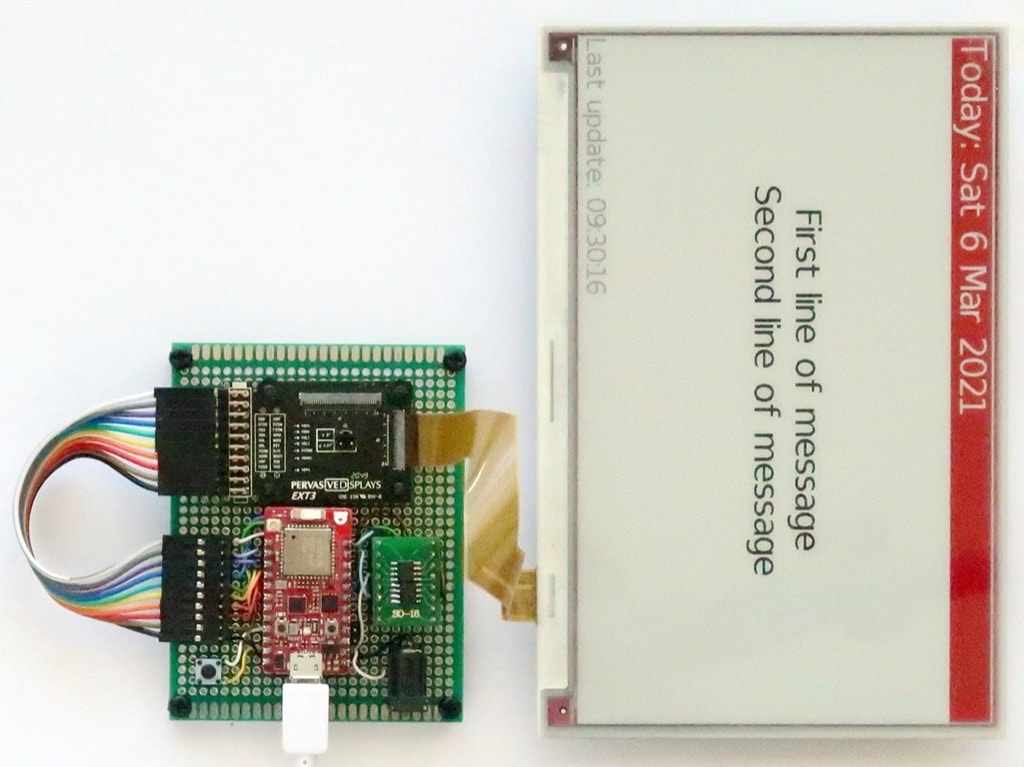
The remote device consists on the Particle Photon board, the Pervasive Displays Extension Kit Gen 3 board and a Pervasive Displays e-ink display.
|
Hardware
|
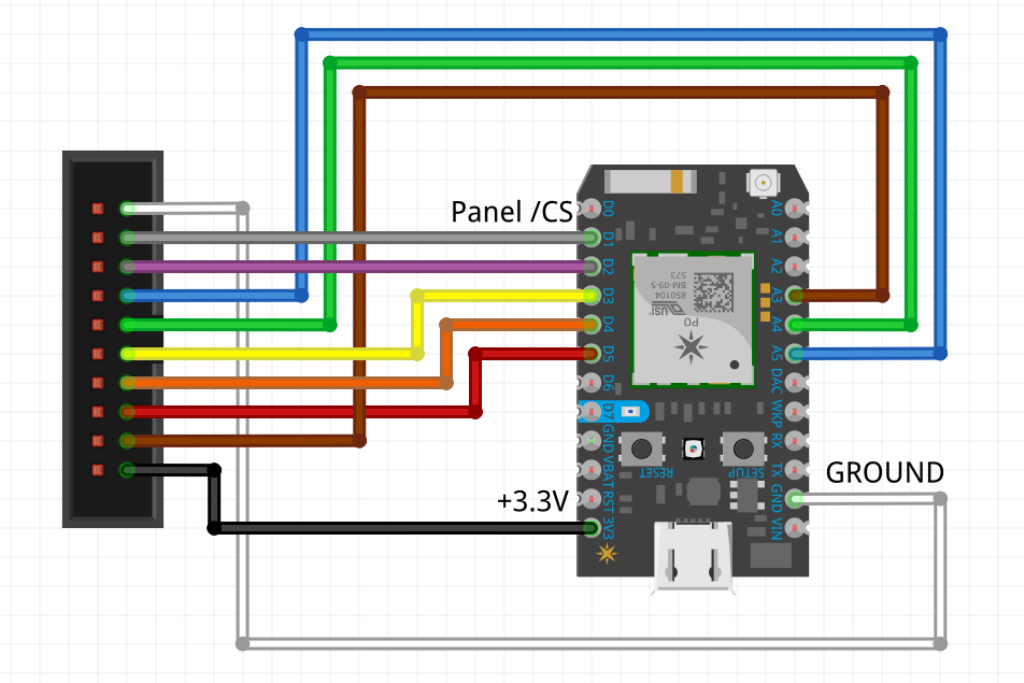
For the hardware part, proceed as follow:
|
|
|
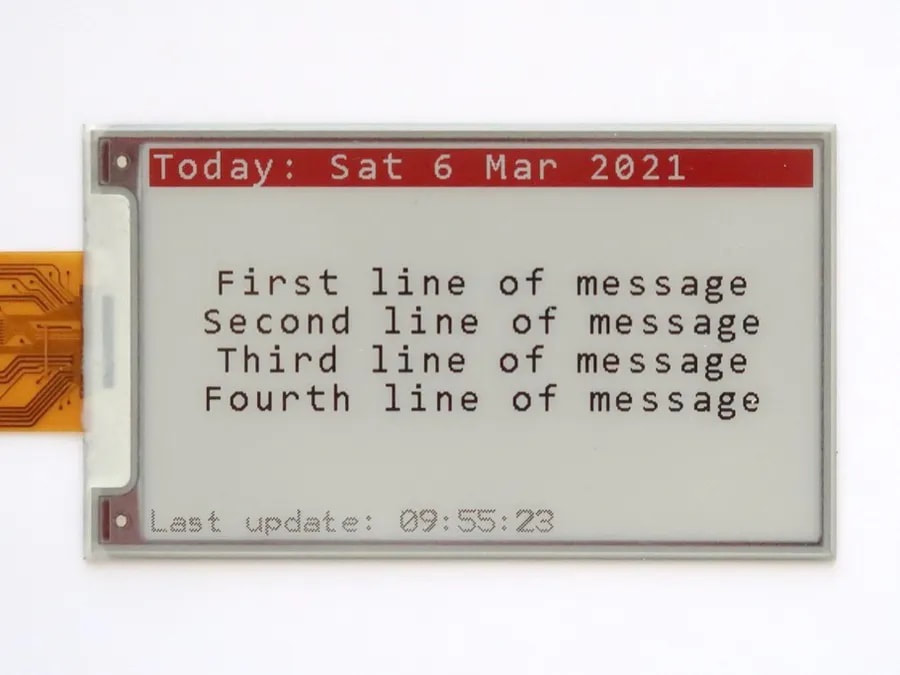
The e-paper screen requires an external frame-buffer, stored in SRAM. The size of the screen is thus limited by the SRAM available on the Particle Photon board: only ca. 50 kB are available out of the 128 kB, enough to support screens up to 4.2" with 400x300 pixels. The project here uses a 3.70" black-white-red screen.
|
|
Software
|
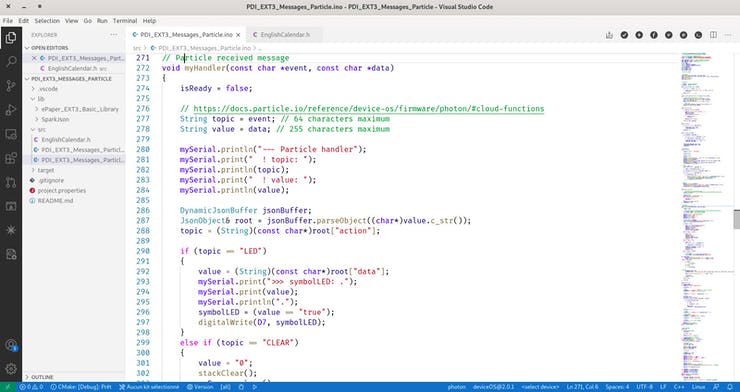
The application relies on the Particle Device OS API for the cloud functions like authenticating, getting time, receiving and sending messages, posting variables.
Particle brings two options, the online Particle Web IDE and the offline Particle Workbench Extension for the Visual Studio Code IDE. The project uses the latter, but it should be the same with the former.
|
The ePaper EXT3 Basic Library provides high-level graphics and text routines with extended fonts and includes all the hardwire-level management of the screen.
|

|
|
The lib folder should contain now two sub-folders: SparkJson and ePaper_EXT3_Basic_Library.
The src folder should contain the PDI_EXT3_Messages_Particle.ino main sketch and EnglishCalendar.h header file. |
|
|
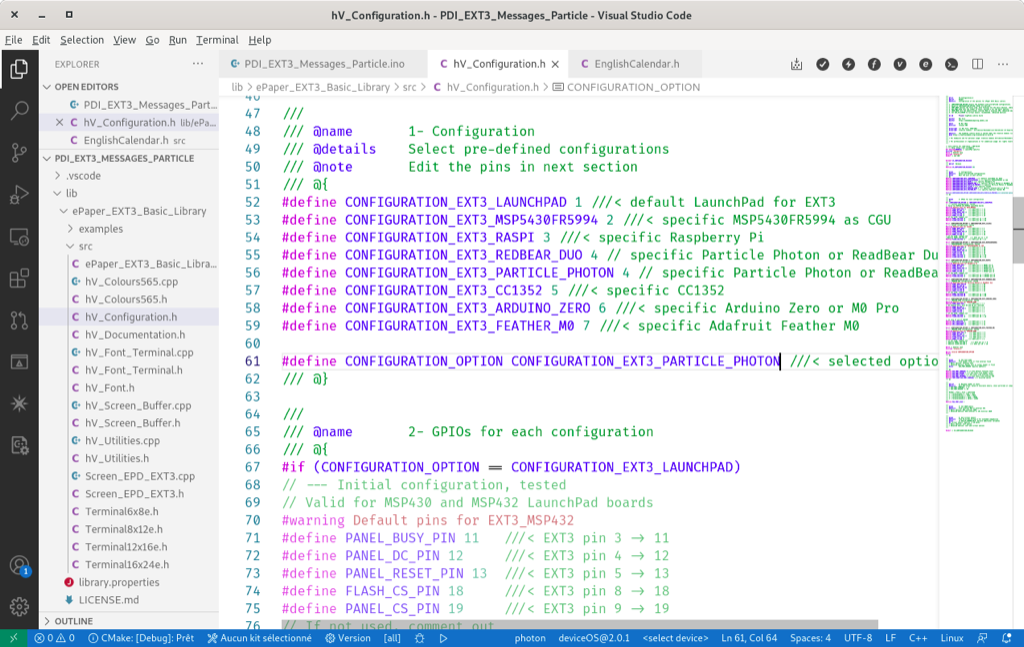
Line 61
|
hV_Configuration.h
|
PDI_EXT3_Messages_Particle.ino
|
|
- Open the main sketch and search for the following lines:
PDI_EXT3_Messages_Particle.ino
|
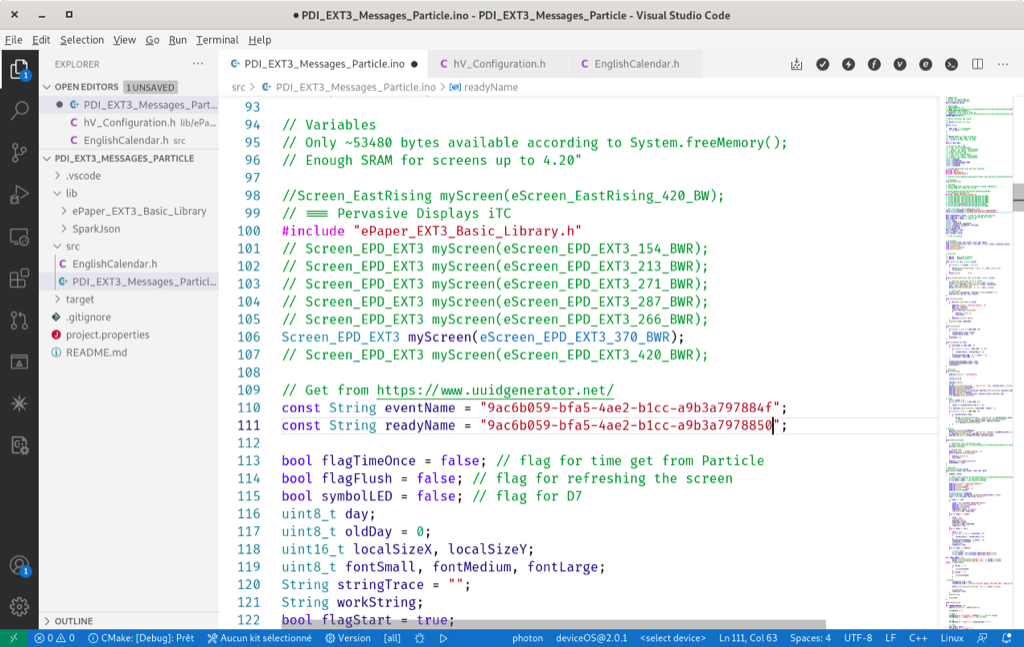
Lines 110 and 111
|
PDI_EXT3_Messages_Particle.ino
|
Dashboard
|
The dashboard runs on Node-RED and relies on the official Particle node. Various features are used: publishing messages to the Photon, subscribing to messages from the Photon, reading variables from the Photon.
|
|
Software
|
The dashboard runs on Node-RED, a graphical programming tool to manage heterogeneous IoT hardware and software.
|
|
|
Now, the Particle nodes need to be configured.
|
|
|
Back to Node-RED, to set the publish node,
|
|
|
To set the variable node,
|
|
|
To set the subscribe node,
|
|
Running the project
|
Let see first the e-paper screen in action.
|
|
|
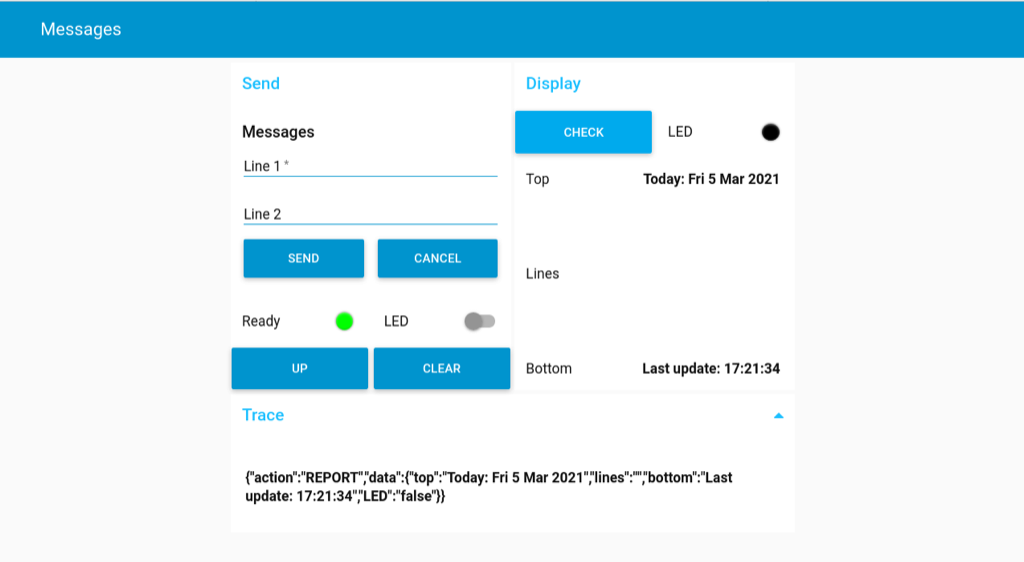
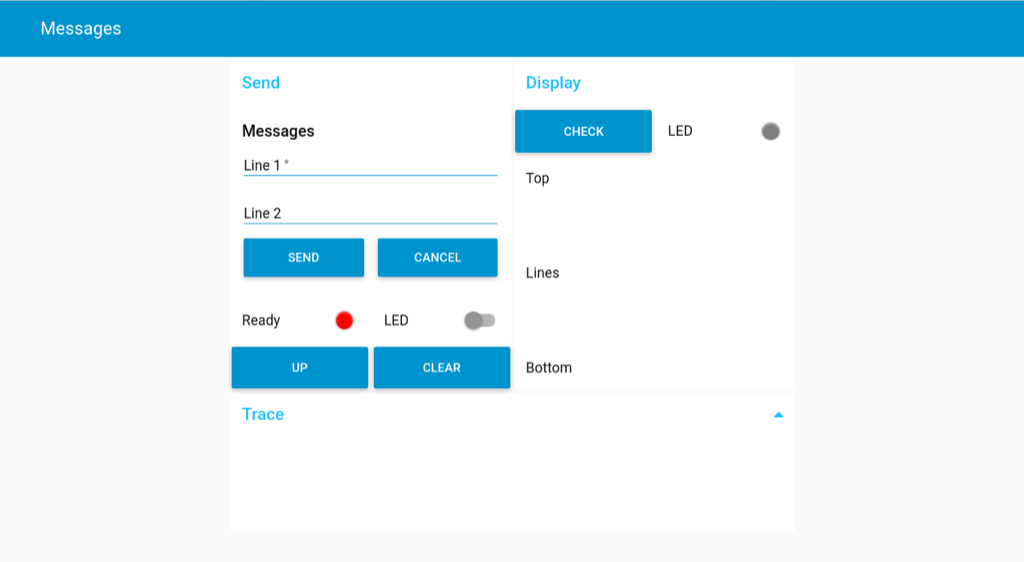
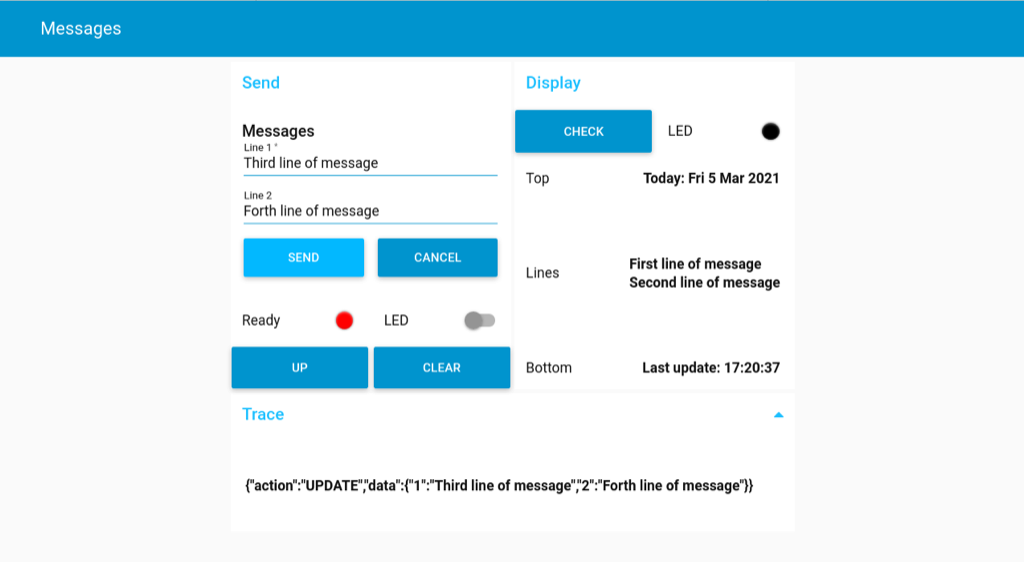
Back to Node-RED, the dashboard offers three panes: Send, Display and Trace.
|
|
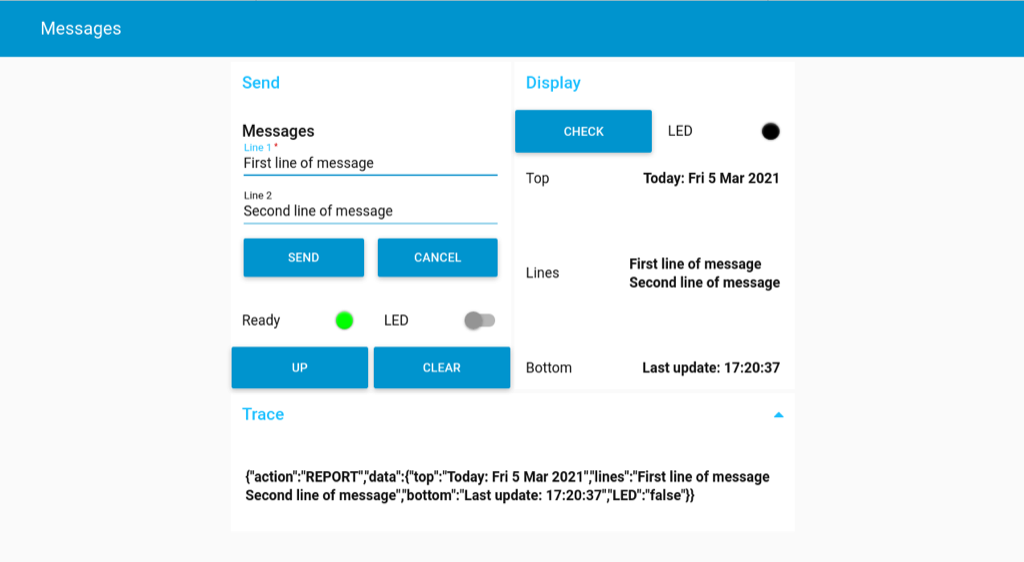
Send pane
|
The Send pane includes a form with two lines and other controls.
|

|
|
|
|
|
|
|
|
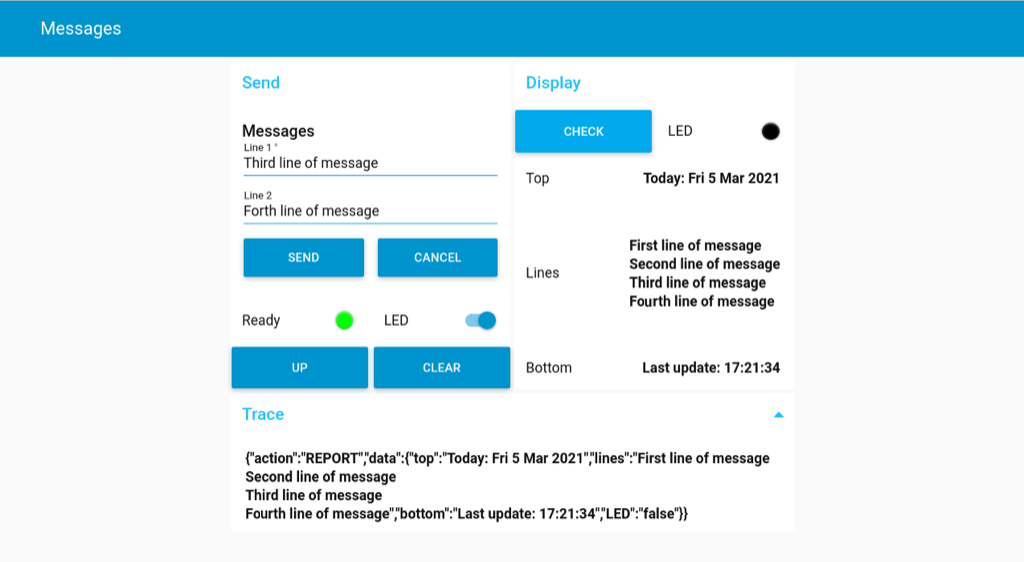
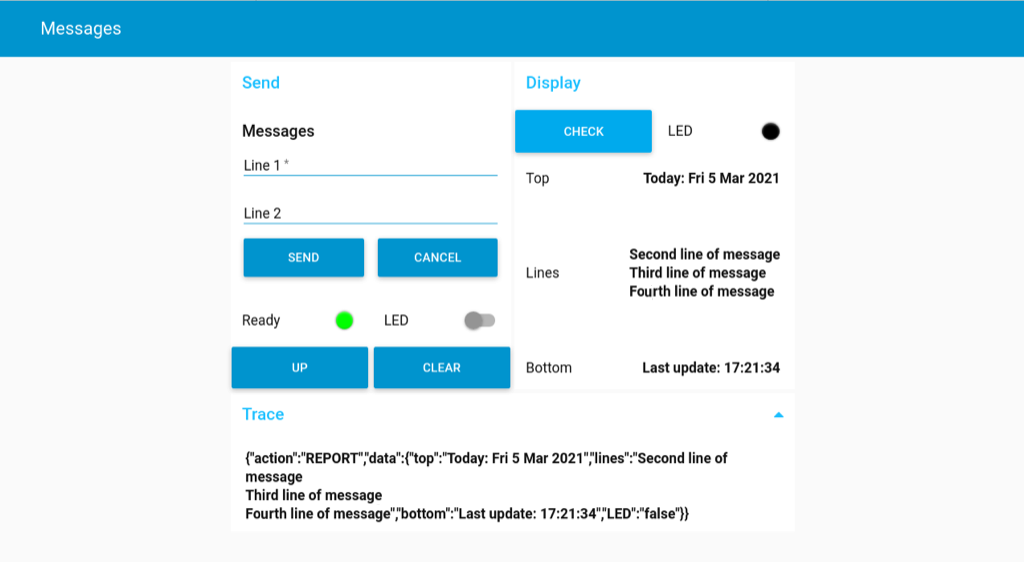
Check pane
|
The Check pane retrieves the actual content of the remote e-paper screen and displays it below.
|
|
Trace pane
|
The foldable Trace pane displays the latest message sent or received.
|
|
Going further
|
Pervasive Displays offer a wide range of screens, from 1.54" up to 12.2". Screens larger than 4.20" may require an external memory like SPI SRAM for the frame-buffer. However, the same Pervasive Displays e-Paper EPD Extension Kit Gen 3 drives them all.
Also related to memory, a non-volatile memory keeps a copy of the messages in case of an accidental power-cycling. The FRAM technology combines the speed of SRAM with the persistence of Flash, and provides an interesting option. The Particle solutions offers interesting options like fleet management for multiple remote screens and low-power mode for battery operation. Similarly, the Particle Console or even the Particule Cloud API with webhooks allow to operate the remote screen without the need of Node-RED. The WiFi radio is power-hungry and obliterates the low-power capabilities of the e-paper screen. So changing for a radio like Bluetooth or sub-1 GHz would enable a year-long autonomy with standard batteries. |
A larger screen may require an external SPI SRAM for the frame-buffer
|
|
Here is an example of a more advanced version. It includes different options mentioned earlier, like:
The nice case fits perfectly in the living room! |

|
Links


Posted: 05 Mar 2021
Updated: 22 Mar 2021, 14 Feb 2022
Updated: 22 Mar 2021, 14 Feb 2022
