Embedded Computing
  • About
  • Blog
  • Hardware
    • Which Platform?
    • Controller Platforms >
      • Adafruit Platform
      • Arduino Plaform
      • BBC micro:bit
      • Espressif Platform
      • iLabs Platform
      • Raspberry Pi Platform (MCU)
      • Seeed Platform
      • Silicon Labs Platform
      • Teensy Plaform
    • Computer Platforms >
      • BeagleBone Platform
      • Raspberry Pi Platform (SBC)
      • UDOO Platform
    • Peripherals >
      • Shields
      • Grove System
      • Sensors
      • Actuators
    • Displays >
      • E-Paper Displays
      • Reflective Displays
      • TFT Displays
      • LCD Displays
    • Legacy Platforms >
      • chipKIT Plaform
      • 4D Systems Platform
      • Intel Platform
      • LaunchPad Plaform
      • BoosterPacks for LaunchPads
      • LightBlue Bean
      • Maple Plaform
      • Mediatek Platform
      • Microsoft Azure IoT DevKit
      • Particle Platform
  • Software
    • Exploring RTOS with Galaxia >
      • Event Library
      • Semaphore Library
      • Mailbox Library
      • Timer Library
      • Clock Library
      • SWI Library
      • Task Library
    • Ultra-Low Power with EnergyTrace >
      • Ultra-Low Power with MSP430
      • Ultra-Low Power with Energia MT and Galaxia
    • Using Integers Instead of Reals
    • Going Python?
  • IoT
    • IoT Platforms: Which Hardware? >
      • Matter with Silicon Labs MG24
    • IoT Services: Which Solution? >
      • Recommended IoT Solutions
      • Platform-Specific IoT Solutions
      • Other IoT Solutions
      • Not tested IoT Solutions
      • Notification Solutions
    • Get Date and Time from Internet with NTP
    • Fast and Easy WiFi Connection with QR-Code
  • Tools
    • How to Start?
    • Reference >
      • Asking for Help
      • Boards Pins Maps
      • Ruler
      • Boards and Plugs
      • I²C Logic Level Converter
      • Standards for Connectors
    • Training >
      • Texas Instruments Workshops
      • Embedded Systems: Shape The World — MOOC edX UTAustinX UT.6.02x
      • Embedded Systems - Shape The World: Microcontroller Input/Output — MOOC edX UTAustinX UT.6.10x
      • Embedded Systems - Shape The World: Multi-Threaded Interfacing — MOOC edX UTAustinX UT.6.20x
      • Real-Time Bluetooth Networks: Shape the World — MOOC edX UTAustinX UT.RTBN.12.01x
      • Systems Thinking with Texas Instruments Robotics System Learning Kit
    • Books >
      • Getting Started with the MSP430 LaunchPad
      • Getting Started with Arduino
      • Arduino Cookbook
    • IDE >
      • The Battle of IDEs
      • More Options
      • Assessing the Next Generation of IDEs
      • Tools for Documentation
    • Equipment >
      • Saleae Logic Analyser
      • Rigol DS1102E Oscilloscope
      • XDS110 Debug Probe with EnergyTrace​
      • Segger J-Link Programmer-Debugger
      • Nordic Power Profiler Kit II
  • Projects
    • Libraries >
      • Master I²C Software Library
      • Date and Time Library
      • highView Library Suite
      • Others Libraries
    • smartDevices >
      • I²C smartColours Smart Sensor
      • I²C smartRFID Smart Sensor
      • I²C smartLED Display
      • I²C smartControls Smart Device
      • I²C smartWiFi Smart Device
      • I²C smartBLE Smart Device
      • I²C smartNode Smart Device
    • IoT Projects >
      • Remote E-Paper Weather and Message Board
      • Typie-Walkie with LoRa and E-Paper Screen
      • Typie-Walkie with E-Paper Screen
      • Remote e-Paper Pictures Panel
      • Remote e-Paper Messages Panel
      • Industrial IoT Project
      • Remote Contactless Temperature Monitor
      • Using Node-RED for IIoT
      • Low Power Home Network Weather Monitoring
      • Updated Low Power Home Network Weather Monitoring
      • Weather and Security Station with Blynk
      • SensorTag to Blynk Using Node-RED
      • Pervasive Reporting
    • AI Projects >
      • Colour Recognition with Neural Network
    • Other Projects >
      • Air Quality Monitoring
      • Driving a Large E-Paper Display with a Compact Xiao RP2040
      • Low-Power E-Paper Weather Station
      • Portable Particulate​ Matter Monitor
      • FRAM-based E-Paper Screen Controller
      • General Purpose 3.5" Screen
      • Colour Recognition with Neural Network
      • A Low Power Weather Station
      • Digital Volt-Amp-Watt Meter
      • Mobile Measurement with LCD Display
      • Screen with SRAM for GUI
      • Volt-Amp-Watt-Meter for Grove
      • Multi-Touch Project with CapTIvate

Task Library

By default, Energia considers each sketch on .ino file as a task and create them as an endless loop in the RTOS scheduler.

However, creating other tasks may be interesting, especially for a better control.

I explain how Energia works and discuss three solutions, two of them actually work.
Picture

What Energia Does

Energia considers each sketch as a task with two functions: initial setup() and to-be-repeated loop(). 

Energia performs some under-the-hood work: it runs the function 
setup() once and includes the loop() function inside an endless loop. 

xdc_Void the_task(xdc_UArg _task_setup, xdc_UArg _task_loop)

{

    /* Call setup once */

    (*(void(*)()) _task_setup)();


    /* Call loop repeatedly */

    for(;;) {

        (*(void(*)()) _task_loop)();

        System_flush();

        Task_yield();

    }

}


Let's Try

The rtosGlobals.h header includes the standard libraries and defines the  task myTask and the timer myTimer, required by the third solution only.  

The mains ketch can be kept with empty setup() and loop() functions.

///

/// @author Rei Vilo

/// @date Jun 23, 2015 10:32

/// @version 101

///

/// @copyright (c) Rei Vilo, 2015

/// @copyright CC = BY SA NC

///


// Core library

#include "Energia.h"


// Include application, user and local libraries

#include "Task.h"

#include "Timer.h"


// Define variables and constants

Task myTask;

Timer myTimer;

uint8_t valueB = 0;


First Solution

The first solution is very similar to the standard implementation of the tasks as sketches by Energia, where the function is included in an endless loop.  

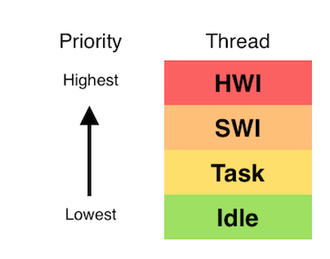
Note that the initialisation of the port is done in the rtosSetup() function.

myTask.begin() defines the function to be called, sets the priority and runs the function once. The priority is a value between 0 and Task_numPriorities -1. Task_numPriorities is a constant provided by RTOS, which value is 16 or 32 and depends on the system.

void functionTask()

{

    // Solution 1: with loop, works fine

    while (true)

    {

        valueB = 1 - valueB;

        digitalWrite(BLUE_LED, valueB);

        delay(333);

    }

}


// Add optional rtosSetup function

void rtosSetup()

{

    pinMode(BLUE_LED, OUTPUT);

    myTask.begin(functionTask, Task_numPriorities - 1);

}


Second Solution Doesn't Work

The second solution doesn't work, as the function functionTask() doesn't include any endless loop. 

Because the task is scheduled only once by myTask.begin(), it runs only once.

void functionTask()

{

    // Solution 2: with delay, doesn't work

    valueB = 1 - valueB;

    digitalWrite(BLUE_LED, valueB);

    delay(333);

}


// Add optional rtosSetup function

void rtosSetup()

{

    pinMode(BLUE_LED, OUTPUT);

    myTask.begin(functionTask, Task_numPriorities - 1);

}


Third and Best Solution

The third and last solution is the cleanest one.

The function functionTask() only toggles the value LED and is called by the timer myTimer every 333 ms.

void functionTask()

{

    // Solution 3: with Timer, works fine

    valueB = 1 - valueB;

    digitalWrite(BLUE_LED, valueB);

}


// Add optional rtosSetup function

void rtosSetup()

{

    pinMode(BLUE_LED, OUTPUT);

    myTask.begin(functionTask, Task_numPriorities - 1);


    // Solution 3: with Timer, works fine

    myTimer.begin(functionTask, 333);

    myTimer.start();

}

My recommendation is to go for the third solution, where the function of the task functionTask() is explicitly called by a timer or a clock.  
Powered by Create your own unique website with customizable templates.