Embedded Computing
  • About
  • Blog
  • Hardware
    • Which Platform?
    • Controller Platforms >
      • Adafruit Platform
      • Arduino Plaform
      • BBC micro:bit
      • Espressif Platform
      • iLabs Platform
      • LaunchPad Plaform
      • Raspberry Pi Platform (MCU)
      • Seeeduino Platform
      • Teensy Plaform
    • Computer Platforms >
      • BeagleBone Platform
      • Raspberry Pi Platform (SBC)
      • UDOO Platform
    • Peripherals >
      • BoosterPacks for LaunchPads
      • Shields
      • Grove System
      • Sensors
      • Actuators
    • Displays >
      • E-Paper Displays
      • Reflective Displays
      • TFT Displays
      • LCD Displays
    • Legacy Platforms
  • Software
    • Exploring RTOS with Galaxia >
      • Event Library
      • Semaphore Library
      • Mailbox Library
      • Timer Library
      • Clock Library
      • SWI Library
      • Task Library
    • Ultra-Low Power with EnergyTrace >
      • Ultra-Low Power with MSP430
      • Ultra-Low Power with Energia MT and Galaxia
    • Using Integers Instead of Reals
  • IoT
    • IoT Platforms: Which Hardware?
    • IoT Services: Which Solution? >
      • Recommended IoT Solutions
      • Platform-Specific IoT Solutions
      • Other IoT Solutions
      • Not tested IoT Solutions
      • Notification Solutions
    • Get Date and Time from Internet with NTP
    • Fast and Easy WiFi Connection with QR-Code
  • Tools
    • How to Start?
    • Reference >
      • Asking for Help
      • Boards Pins Maps
      • Ruler
      • Boards and Plugs
      • I²C Logic Level Converter
      • Standards for Connectors
    • Training >
      • Texas Instruments Workshops
      • Embedded Systems: Shape The World — MOOC edX UTAustinX UT.6.02x
      • Embedded Systems - Shape The World: Microcontroller Input/Output — MOOC edX UTAustinX UT.6.10x
      • Embedded Systems - Shape The World: Multi-Threaded Interfacing — MOOC edX UTAustinX UT.6.20x
      • Real-Time Bluetooth Networks: Shape the World — MOOC edX UTAustinX UT.RTBN.12.01x
      • Systems Thinking with Texas Instruments Robotics System Learning Kit
    • Books >
      • Getting Started with the MSP430 LaunchPad
      • Getting Started with Arduino
      • Arduino Cookbook
    • IDE >
      • The Battle of IDEs
      • More Options
      • Assessing the Next Generation of IDEs
      • Tools for Documentation
    • Equipment >
      • Saleae Logic Analyser
      • Rigol DS1102E Oscilloscope
      • XDS110 Debug Probe with EnergyTrace​
      • Segger J-Link Programmer-Debugger
      • Nordic Power Profiler Kit II
  • Projects
    • Libraries >
      • Master I²C Software Library
      • Date and Time Library
      • highView Library Suite
      • Others Libraries
    • smartDevices >
      • I²C smartColours Smart Sensor
      • I²C smartRFID Smart Sensor
      • I²C smartLED Display
      • I²C smartControls Smart Device
      • I²C smartWiFi Smart Device
      • I²C smartBLE Smart Device
      • I²C smartNode Smart Device
    • IoT Projects >
      • Remote e-Paper Pictures Panel
      • Remote e-Paper Messages Panel
      • Industrial IoT Project
      • Remote Contactless Temperature Monitor
      • Using Node-RED for IIoT
      • Low Power Home Network Weather Monitoring
      • Updated Low Power Home Network Weather Monitoring
      • Weather and Security Station with Blynk
      • SensorTag to Blynk Using Node-RED
      • Pervasive Reporting
    • AI Projects >
      • Colour Recognition with Neural Network
    • Other Projects >
      • Driving a Large E-Paper Display with a Compact Xiao RP2040
      • Low-Power E-Paper Weather Station
      • Portable Particulate​ Matter Monitor
      • FRAM-based E-Paper Screen Controller
      • General Purpose 3.5" Screen
      • Colour Recognition with Neural Network
      • A Low Power Weather Station
      • Digital Volt-Amp-Watt Meter
      • Mobile Measurement with LCD Display
      • Screen with SRAM for GUI
      • Volt-Amp-Watt-Meter for Grove
      • Multi-Touch Project with CapTIvate

IoT with Node-Red

How to manage heterogeneous hardware and software environments? How to stay away from the cloud and use a local server? ​Node-RED provides an elegant solution to merge different IoT devices and services, and stay within a local area network. 
​
Node-RED is based on a graphical interface and rely on three main concepts.
  • A project is called a flow, and consists of data and functions linked together.
  • The messages carry data from one node to another.
  • The nodes are functions that generate, transform or use messages.
Picture
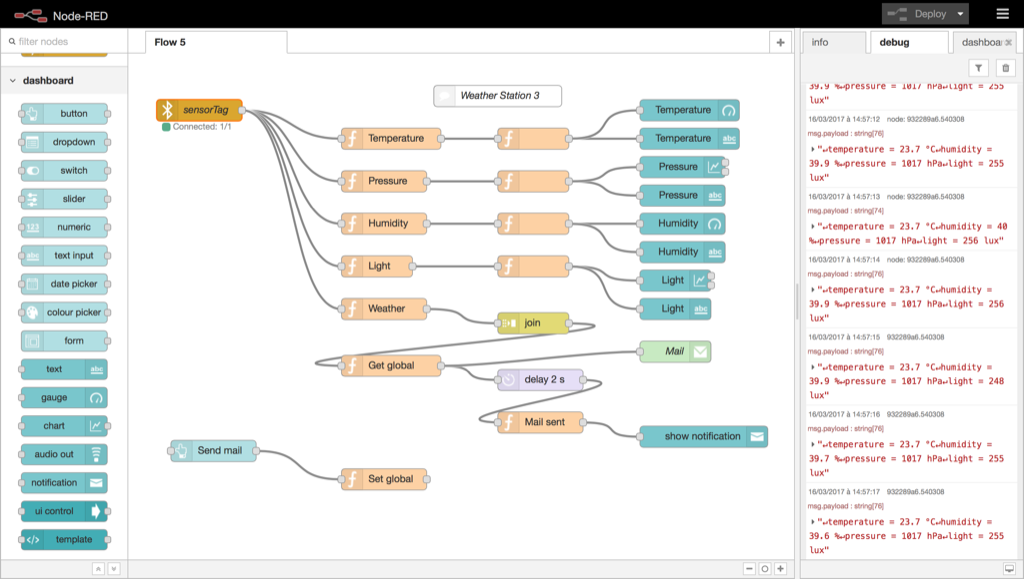
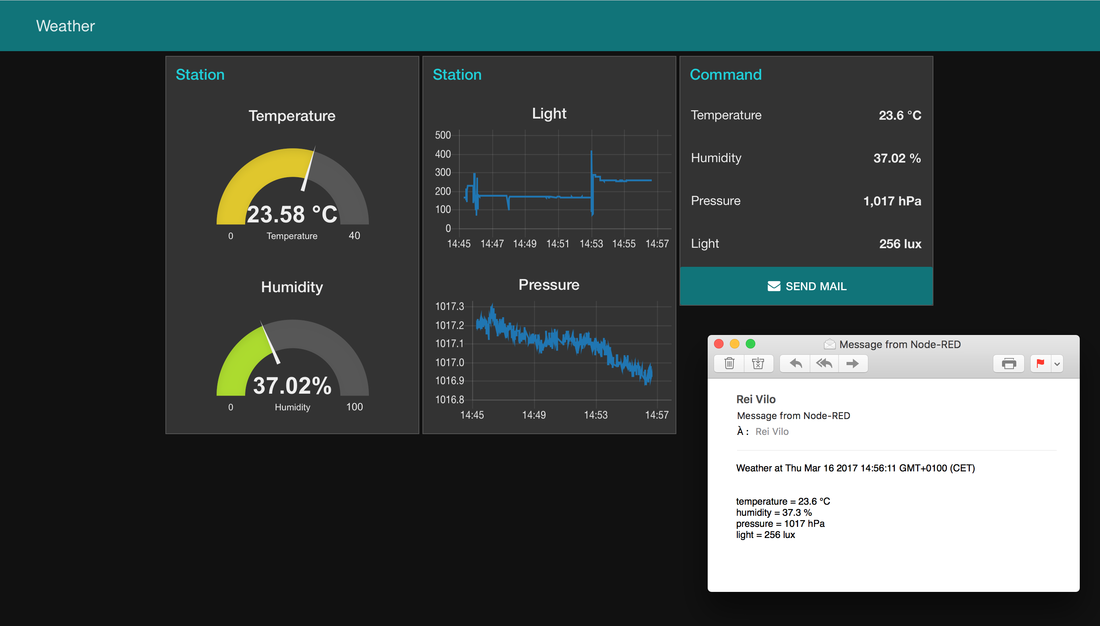
The Node-RED GUI consists on three parts, from left to right:
  • The left pane lists all the nodes, grouped by categories.
  • The centre pane corresponds to the working area, where the flow is going to be designed.
  • The right pane provides useful tools as documentation, a console for debugging, and the organisation for the dashboard.
Picture

The Flow

The flow has three parts, from left to right:
Picture
  • On the left, the SensorTag node is the input, connects to the SensorTag CC2650 and acquires the data, here temperature, humidity, pressure and light.​​ 
  • On the middle, the nodes sort the information and process the data.
  • On the right, each node corresponds to an output, here a widget on the dashboard.

​Let's detail each part.
  • Inputs
​​Left, the SensorTag node provides all the settings. It scans multiple device, selects one and reads the sensors checked. 

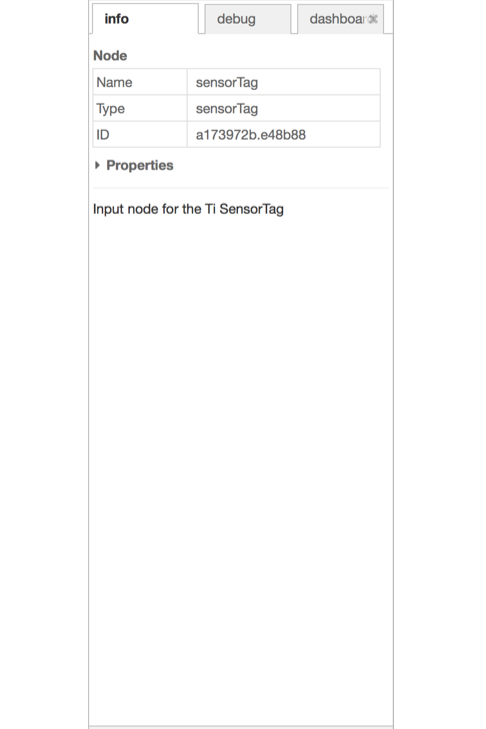
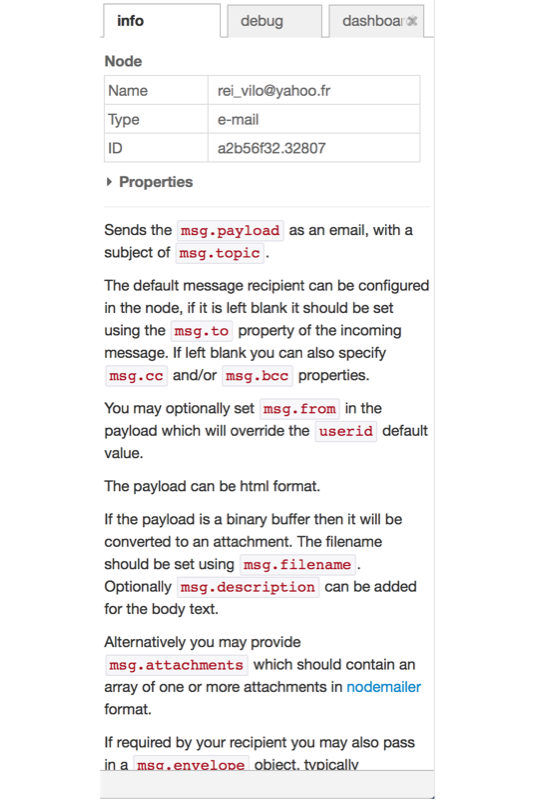
Right, the Info pane provided the Info pane for each node.

Click on the images to enlarge.

Picture
Picture
  • ​Data process
The most useful node is Function, which receives, modifies and sends the message msg. 

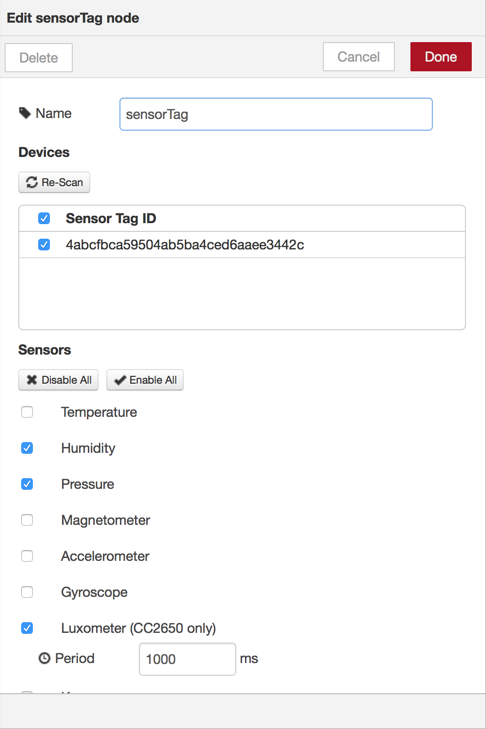
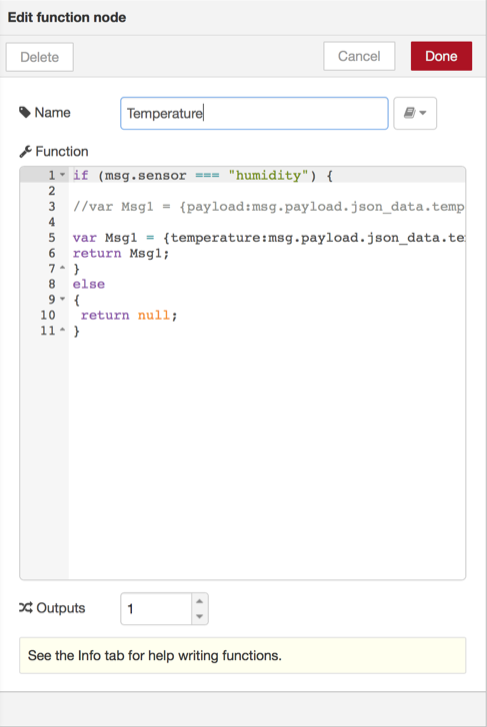
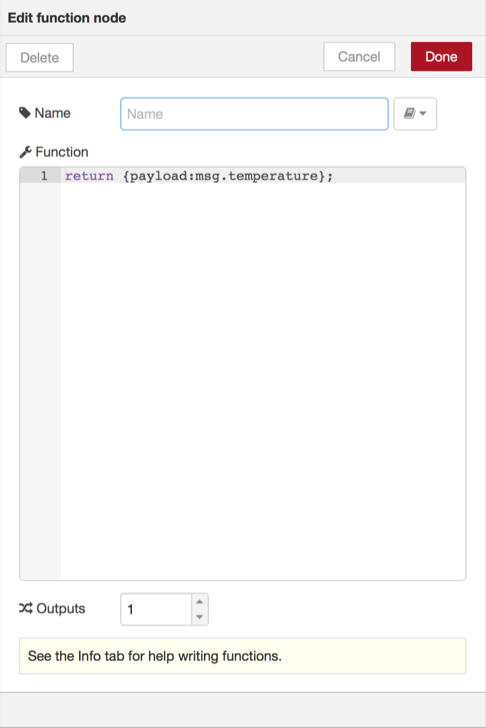
Left, the function checks the incoming message comes from the humidity sensor, reads and sends the value of the thermometer, as the humidity sensor provides both relative humidity and temperature measures.

Right, the function reads the temperature from the incoming message and sets the payload to the measure.  
Picture
Picture
  • ​Outputs
Left, the gauge node read the value from the incoming message, keeps on decimal place and formats it with °C.

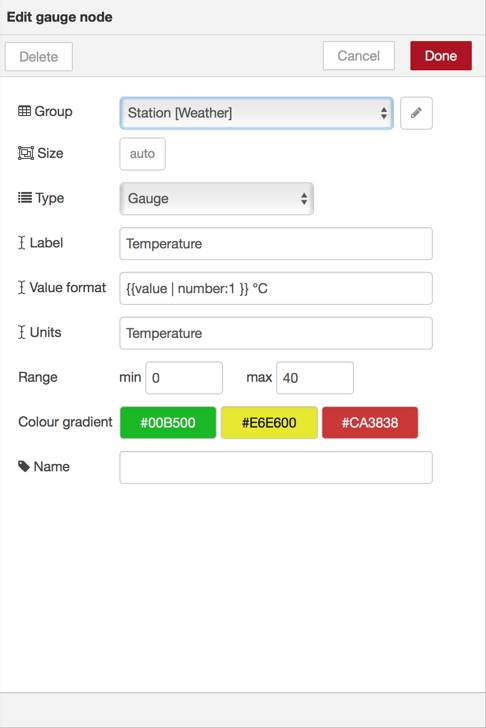
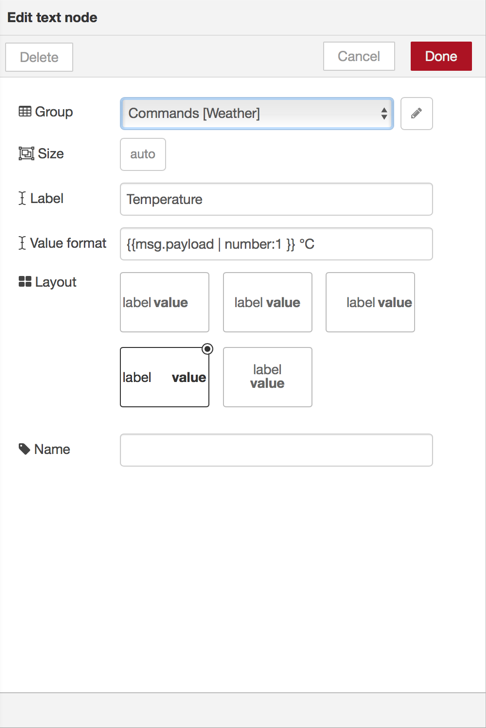
Right, the text node performs the same tasks and displays the value as a label.
Picture
Picture
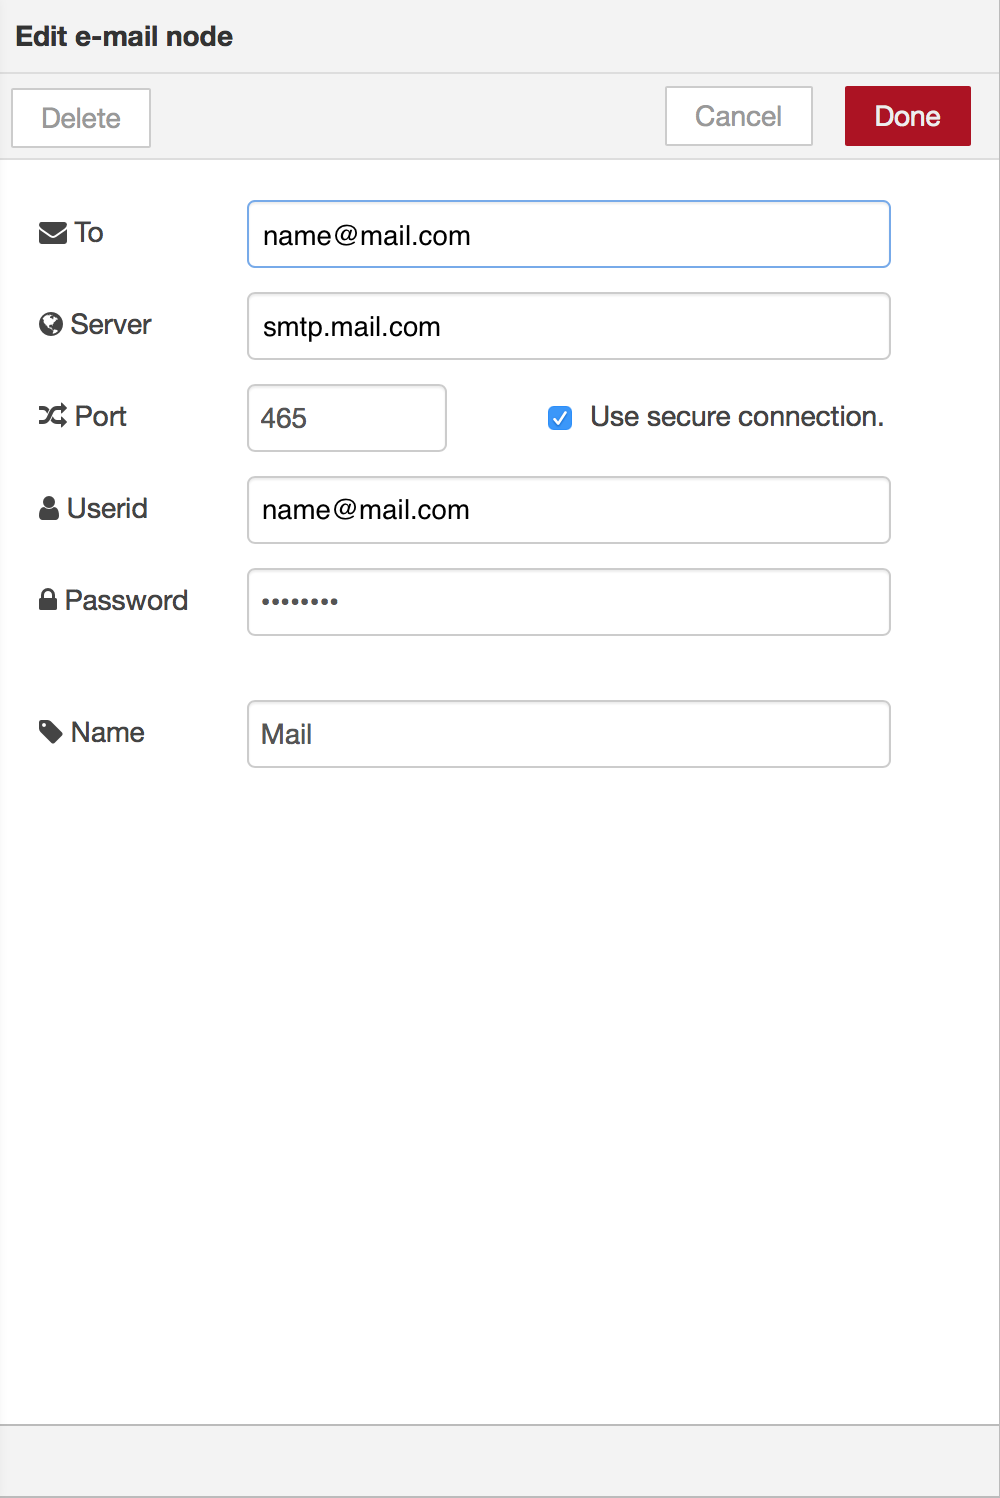
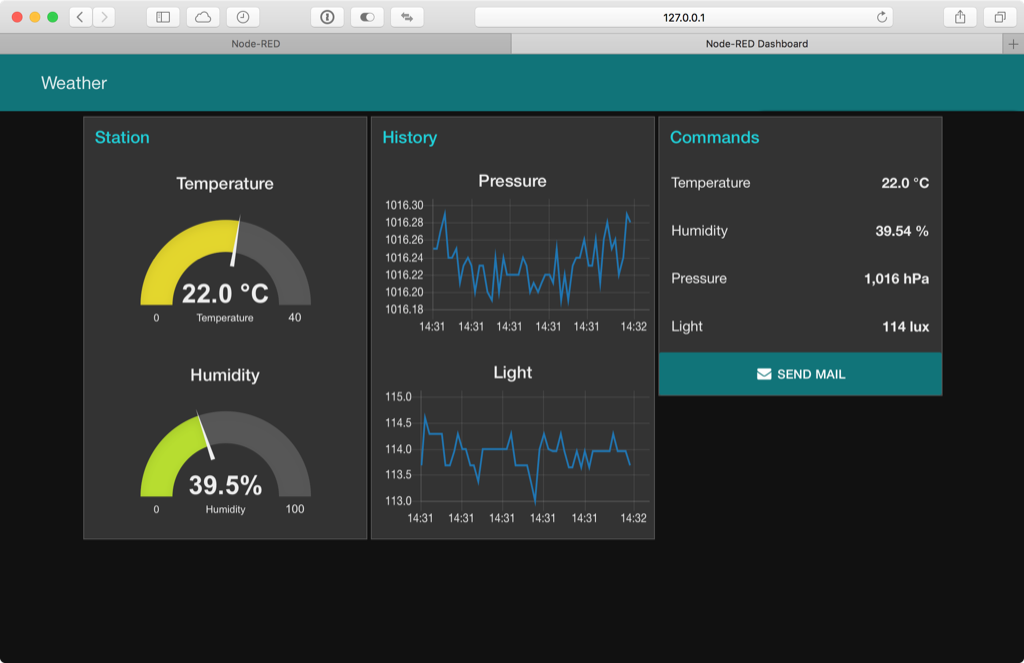
Node-RED offers native support for other services. For example, there is a node for sending e-mails.

Node-RED relies on MQTT, which requires a TCP/IP stack. My first idea was to use a bridge to translate incoming data flows from BLE to MQTT, and to outgoing command flows from MQTT to BLE. 

​Unfortunately, I haven't found an adequate one. Similar question applies to the CC1350 SensorTag, which relies on sub-1 GHz radio.
Picture
Picture

The Message

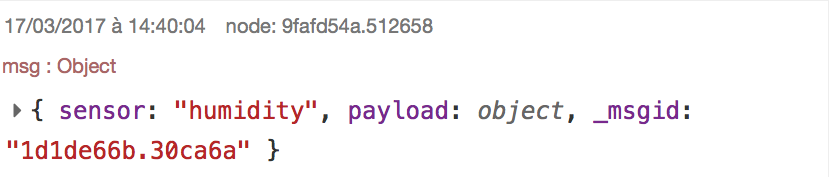
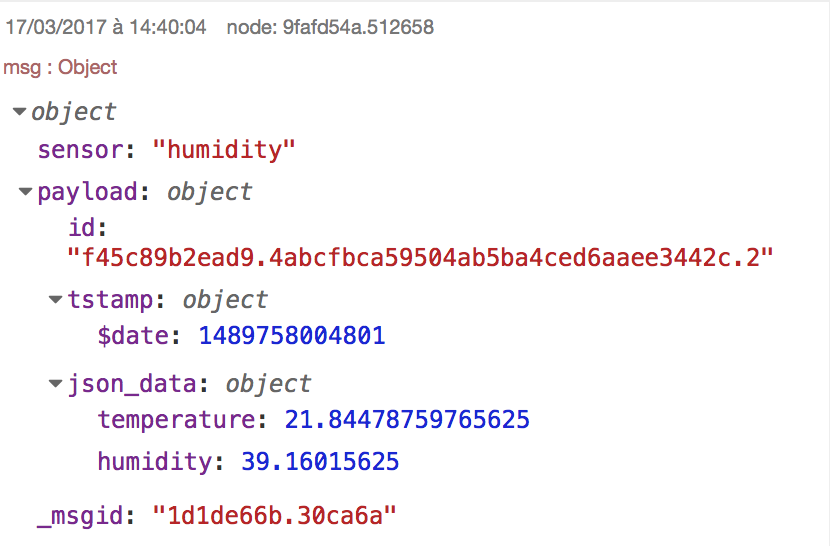
The message is formatted with JSON or JavaScript Object Notation. Note the message includes a time stamp in epoch format.
Picture
The added green Debug node displays the content of the message on the right pane, either in compact or expanded form.
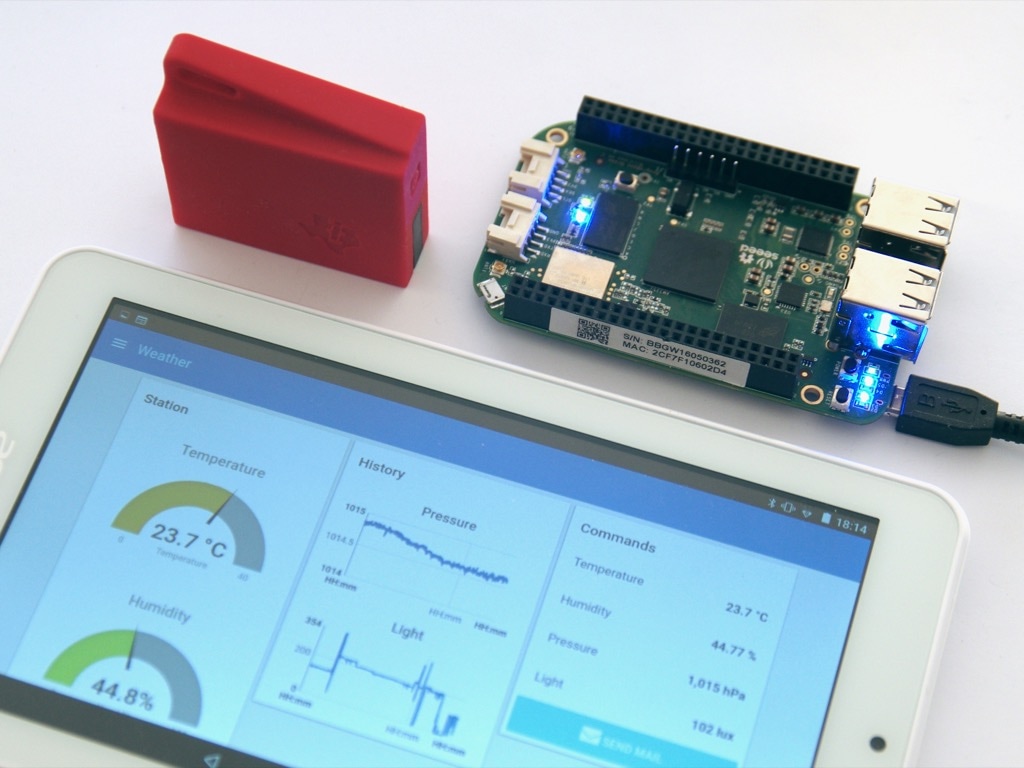
Picture
Picture


Solution with ​Three Devices

The project includes the SensorTag CC2650, a BeagleBone Green Wireless and a Android-powered 7" tablet.
  • The SensorTag CC2650 acquires and sends data through BLE to the BeagleBone Green Wireless.
  • The BeagleBone Green Wireless receives, processes and stores data, and generates a dashboard as a website available through WiFi.
  • The Android-powered tablet connects through WiFi and displays the dashboard.
Picture
Node-RED features responsive design for the dashboard, here with dark theme in portrait and landscape modes on a 7" tablet. 
Picture
Picture

Solution with ​Two Devices for Bluetooth

As an alternative, I removed the separate Node-RED local server and independent tablet and host them both on my laptop.
​
  • First, open a Terminal window and launch Node-RED. The server runs at http://127.0.0.1:1880.  
Picture
  • Copy-paste the address http://127.0.0.1:1880 on any browser and select the dashboard. Both Safari and Chrome work fine.

The tablet can still connect to the Node-RED server: just provide the IP address of the laptop.
Picture
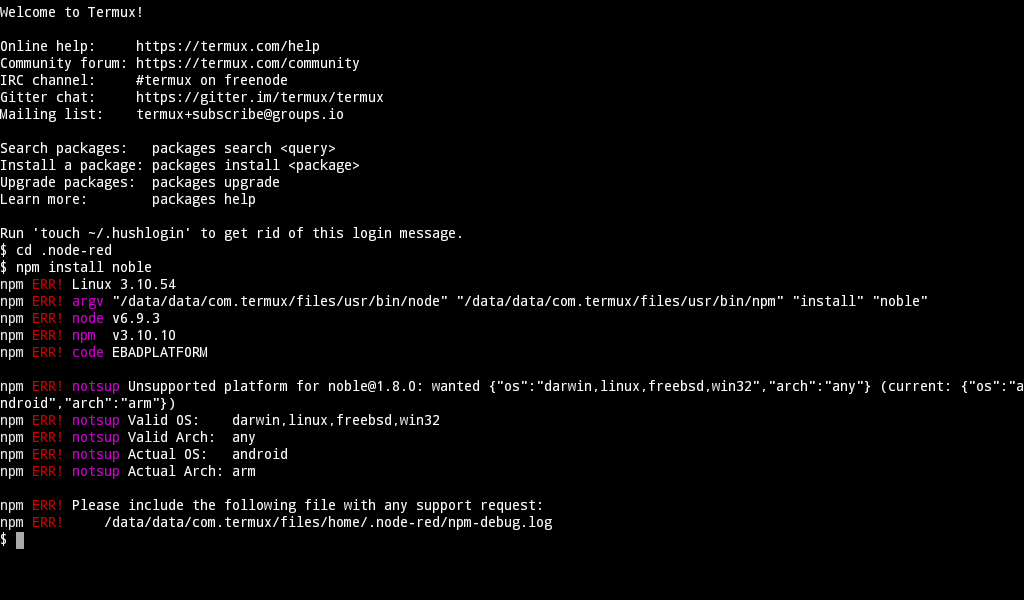
I tried a similar approach with BLE on an Android-based tablet.

​I followed the instructions from Running Node-RED on Android, added the required additional nodes and copied-pasted the flow I've developed earlier.

Unfortunately, the SensorTag node requires the Noble node for BLE, which is not available for Android. 
Picture

​Solution with ​Two Devices for WiFi

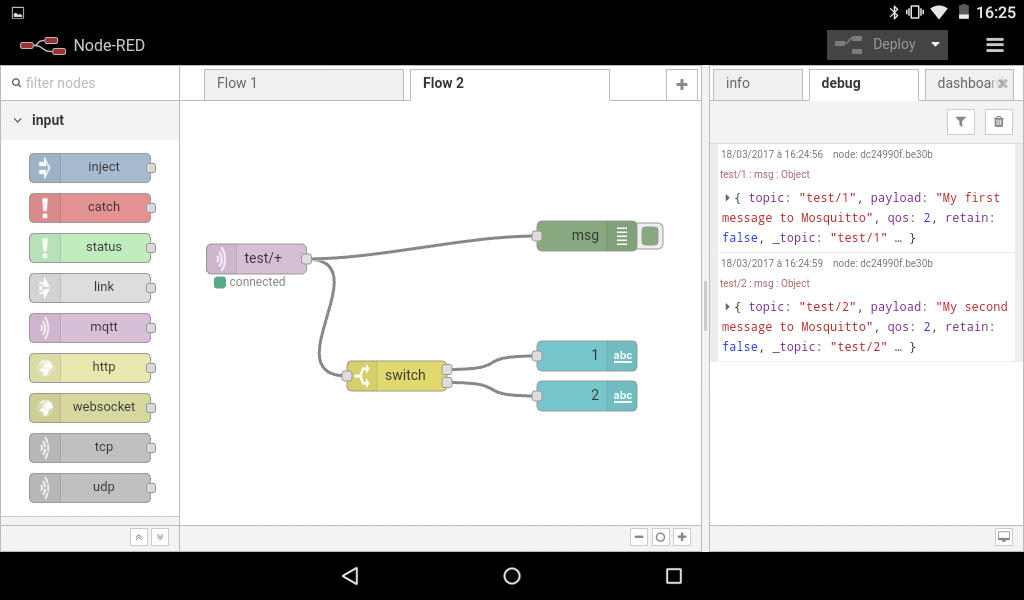
However, the Android-based tablet can run a MQTT server like mosquitto with WiFi.

​MQTT is a lightweight protocol for IoT, based on the publish/subscribe architecture. MQTT requires a TCP/IP stack, hence the use of WiFi. A typical MQTT message consists on a topic and a payload.

Node-RED supports MQTT natively, making the implementation very easy.

The flow is very similar to the previous one, with the MQTT node as input, the switch node as process, and two text displayed on the dashboard as output.
​
Picture
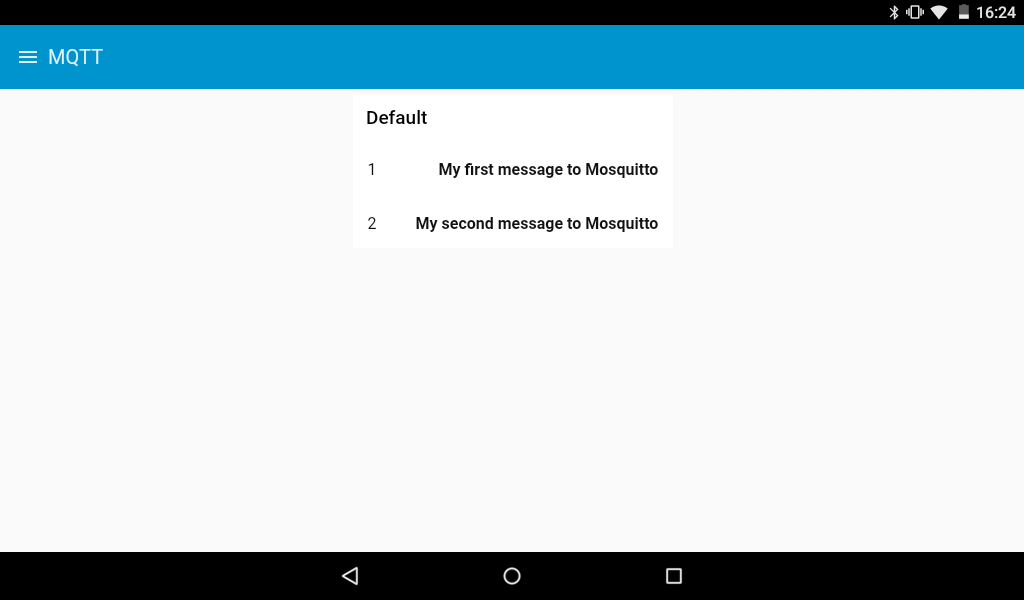
mosquitto_pub allows to send a message manually, with
  • -h for host,
  • -t for topic, and
  • -m for message.

    
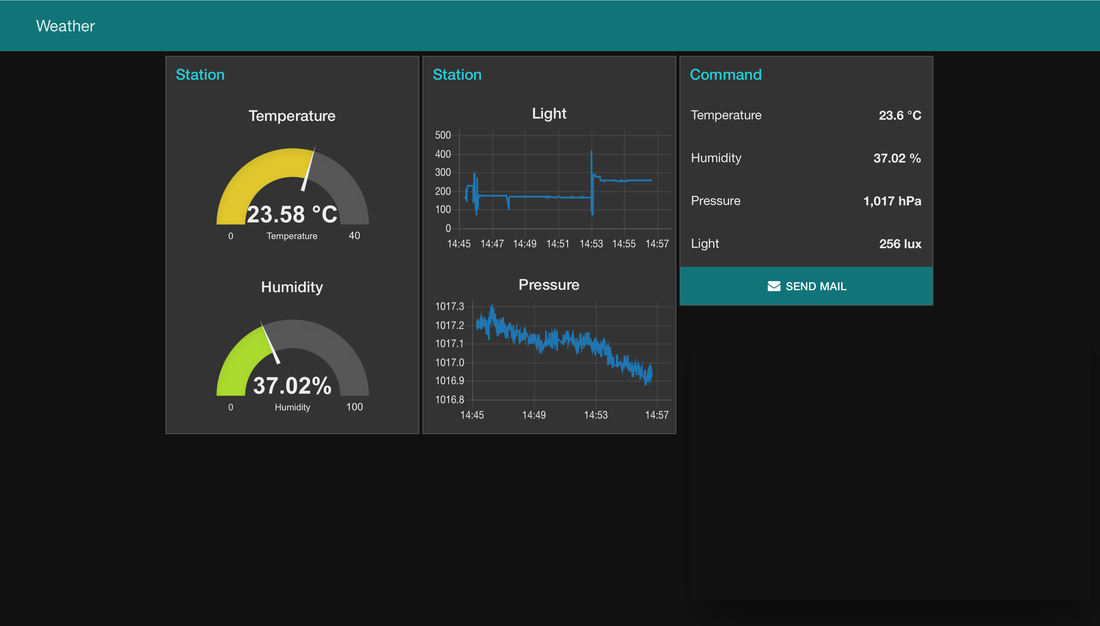
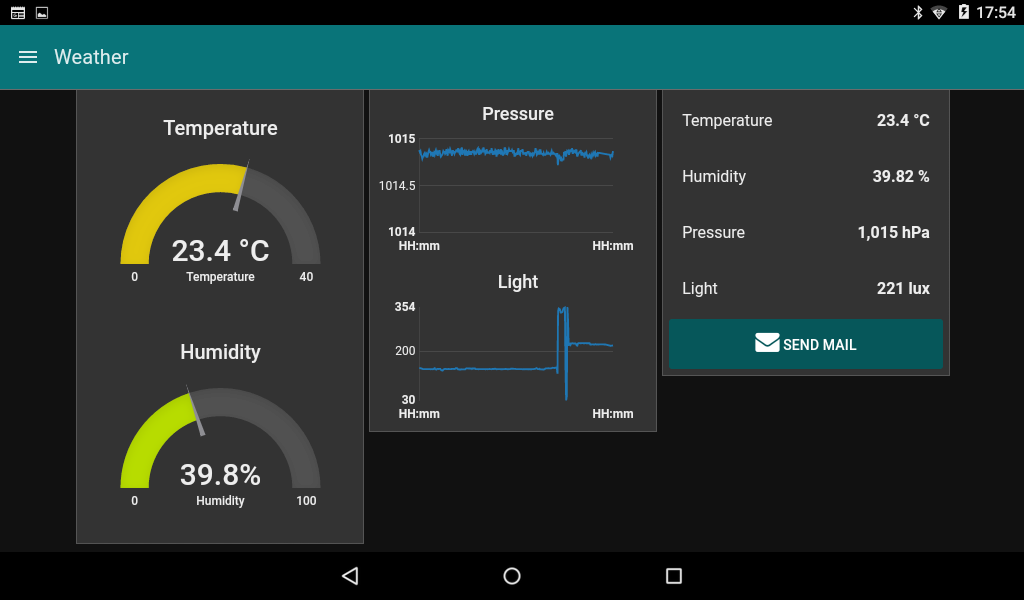
Two messages are sent to the tablet, which IP address is 192.168.1.2, and displayed on the dashboard, here on kiosk mode.
Picture

Advanced Features

The Roadmap to 1.0 gives a clear view of future developments and features. Most promising are the split between the IDE and the runtime.

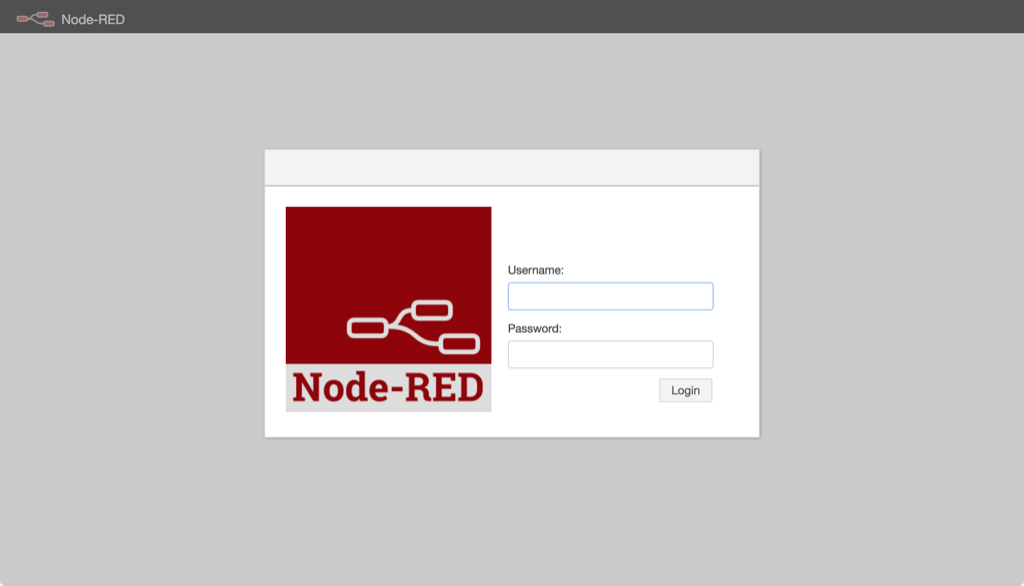
Access to the IDE can now be secured. This is done with either Username/password based authentication or OAuth/OpenID based authentication.
Picture
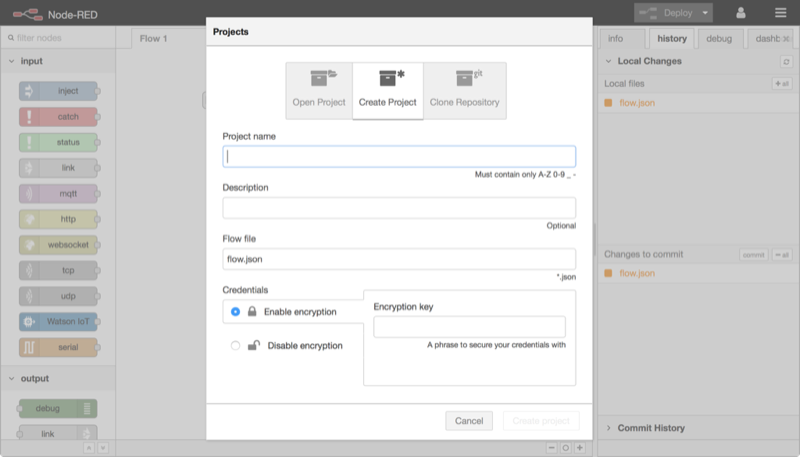
Release 0.18 includes very interesting new features.

Among others, Node-RED now includes projects. A project consists on a set of flows, with optional encryption, a list of dependencies and version management. Ir requires the git and ssh-keygen tools.


Picture
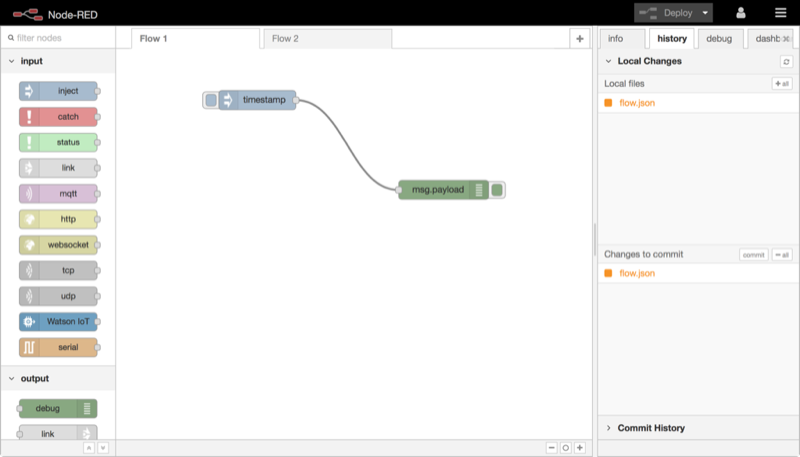
Changes can be committed locally or remotely.

​However, those features need to be 
enabled manually on release 0.18.
Picture
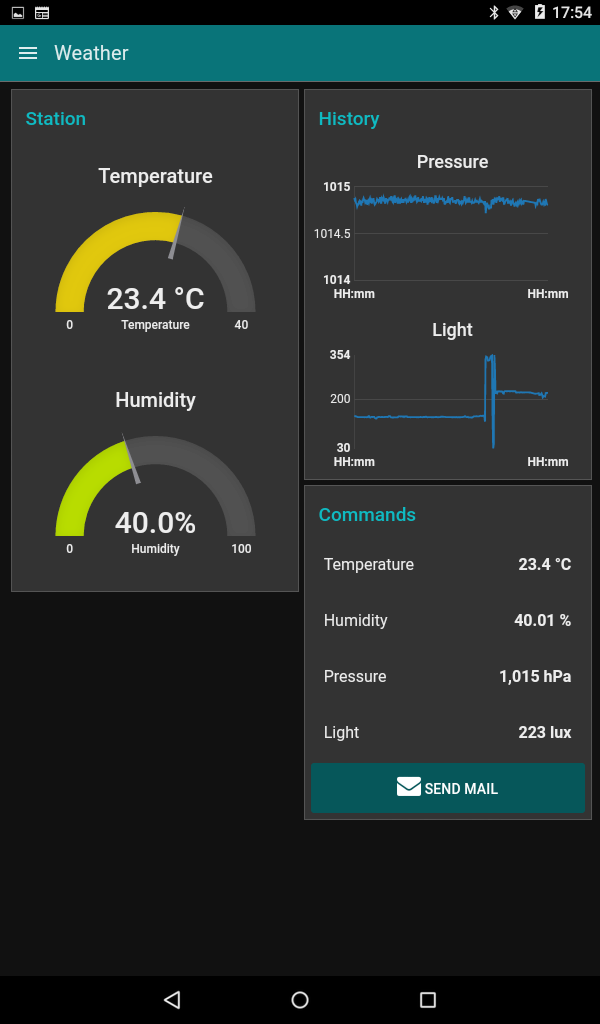
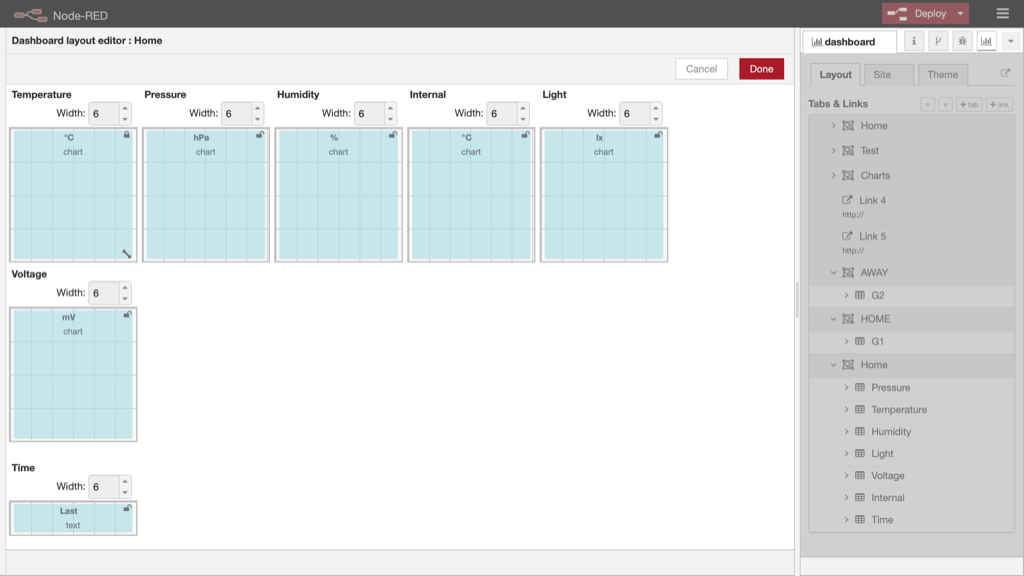
The dashboard has always been difficult to design.

With release 2.16.0, the dashboard node features a dedicated layout view. GUI elements can be resized and moved.
Picture

Node-RED Desktop

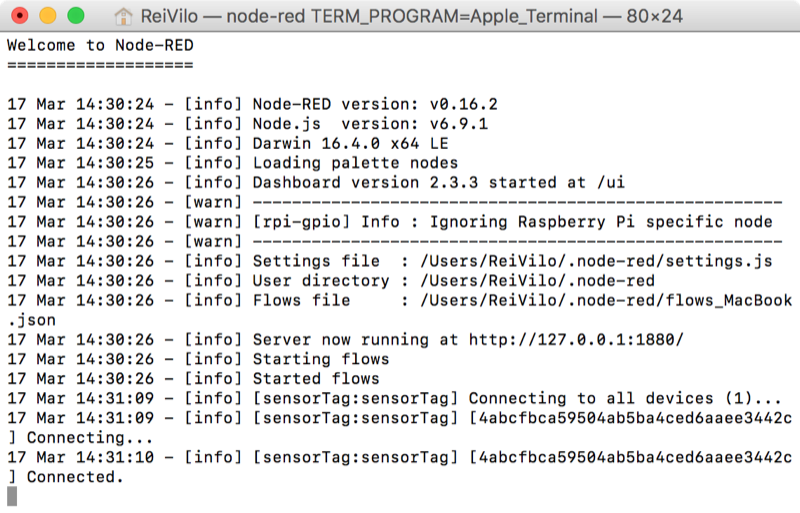
Instead of opening a Terminal window to launch Node-RED through command-line and use a separate browser to access the IDE, the ​Node-RED Desktop combines both.

The application is available for macOS and Windows and relies on Electron. It also packs ngrok to allow access from internet. Additional nodes are managed within the IDE through the Palette configuration menu.

​Although still in beta, it is very stable. Support is very responsive and minor issues (ticket #2 and ticket #4) were quickly fixed.

I hope next release will include the dashboard as well (ticket #3), for example on a separate tab, to get rid of the external browser. 

Electron Node-RED

The Electron Node-RED project offers a similar solution, also based on Electron.

​Just run three commands to install it.

    
However, the editor and the dashboard stay within the same but unique window (ticket #4). Similarly, some basic features, like copy-paste, do not work properly (ticket #3).

Once configured, the Electron Node-RED can be turned into an stand-alone application using Electron Packager.

Conclusion

I really like the way Node-RED manages heterogenous hardware and software environments, and offers great flexibility.

The same laptop runs the server and displays the dashboard, or separate BeagleBone Green Wireless runs the server and an independent tablet displays the dashboard.

Node-RED is actively developed with a clear Roadmap to 1.0. Similarly, the documentation has been updated with a fresher look. 

​More importantly, the whole configuration stays within the local area network.
Picture

Pros

  • Local server
  • Perfect for heterogeneous environments
  • Low hardware requirements

Cons

  • Some nodes are not available for Android

Wrap-Up

  • Local server​
  • Perfect for heterogeneous environments

Links

  • ​Node.js​
  • npm​
  • Node-RED​
  • MQTT
  • Node-RED Desktop​
Picture
Picture
Picture
Picture
Posted: 16 Mar 2017
​Updated:
17 Mar 2017; 13 Sep 2017; 27 Feb 2018 ; 28 May 2019 ; 19 Aug 2019
Powered by Create your own unique website with customizable templates.