Embedded Computing
  • About
  • Blog
  • Hardware
    • Which Platform?
    • Controller Platforms >
      • Adafruit Platform
      • Arduino Plaform
      • BBC micro:bit
      • Espressif Platform
      • LaunchPad Plaform
      • Microsoft Azure IoT DevKit
      • Seeeduino Platform
      • Teensy Plaform
    • Computer Platforms >
      • BeagleBone Platform
      • Mediatek Platform
      • UDOO Platform
    • Legacy Platforms >
      • chipKIT Plaform >
        • chipKIT Uno32 and uC32
        • chipKIT WF32 and WiFire
        • Compatibility
        • chipKIT PGM Programmer-Debugger
        • 4D Systems PICadillo-35T
        • Shields for chipKIT Uno32
        • 4D Systems Platform >
          • 4D Systems PICadillo-35T
          • 4D Systems gen4-IoD-28T
      • Cosa, an Alternative Framework for AVR Boards
      • DFRobot Platform >
        • DFRobot BLuno
        • DFRobot Wido
      • Digistump Platform >
        • Digispark
        • Oak
      • Intel Platform >
        • Intel Curie with Neural Network
        • Intel Edison
      • LightBlue Bean
      • Little Robot Friends
      • Maple Plaform >
        • LeafLabs Maple
      • Microduino Plaform >
        • Microduino
      • Particle Platform >
        • Particle Core
        • Particle Photon
        • Particle Tools
      • Protostack Platform >
        • Protostack Boards
      • RedBear Platform >
        • RedBearLab CC3200
        • RedBearLab WiFi Mini
        • RedBear Duo
      • Wiring Plaform >
        • Wiring S
        • Wiring Play Shield
    • Boards and Plugs
    • I²C Logic Level Converter
    • Peripherals >
      • BoosterPacks for LaunchPads
      • Shields
      • Grove System
      • Ten Years with the Grove System
      • Sensors
      • Actuators
    • Displays >
      • Pervasive Displays e-Paper Screens
      • FRAM-based E-Paper Screen Controller
      • The 2.8" HY28A LCD Screen
      • High-Definition 480x320 3.5" Screen With Touch and Fonts
      • Kentec 3.5" LCD SPI with Touch BoosterPack
      • 4D Systems Intelligent Screens
      • East Rising 5" LCD with RA8875, Touch, Fonts, Flash and SD-card
      • East Rising 5" LCD with SSD1963, Touch, Flash and SD-card
  • Software
    • The IDE Question >
      • The Battle of IDEs
      • More IDE Options
      • Looking for a Better IDE
      • Assessing the Next Generation of IDEs
    • Exploring RTOS with Galaxia >
      • Event Library
      • Semaphore Library
      • Mailbox Library
      • Timer Library
      • Clock Library
      • SWI Library
      • Task Library
    • Ultra-Low Power with EnergyTrace >
      • Ultra-Low Power with MSP430
      • Ultra-Low Power with Energia MT and Galaxia
    • Using Integers Instead of Reals
  • IoT
    • IoT Platforms: Which Hardware?
    • IoT Services: Which Solution? >
      • Recommended IoT Solutions
      • Platform-Specific IoT Solutions
      • Other IoT Solutions
      • Not tested IoT Solutions
      • Notification Solutions
    • Get Date and Time from Internet with NTP
    • Fast and Easy WiFi Connection with QR-Code
  • Tools
    • How to Start?
    • Reference >
      • Asking for Help
      • LaunchPad and BoosterPack Boards Pins Maps
      • Ruler
      • Standards for Connectors
    • Training >
      • Texas Instruments Workshops
      • Embedded Systems: Shape The World — MOOC edX UTAustinX UT.6.02x
      • Embedded Systems - Shape The World: Microcontroller Input/Output — MOOC edX UTAustinX UT.6.10x
      • Embedded Systems - Shape The World: Multi-Threaded Interfacing — MOOC edX UTAustinX UT.6.20x
      • Real-Time Bluetooth Networks: Shape the World — MOOC edX UTAustinX UT.RTBN.12.01x
      • Systems Thinking with Texas Instruments Robotics System Learning Kit
    • Books >
      • Getting Started with the MSP430 LaunchPad
      • Getting Started with Arduino
      • Arduino Cookbook
    • IDEs >
      • Texas Instruments Code Composer Studio 6
      • Texas Instruments Code Composer Studio Cloud
      • Energia
      • Tools for Documentation
    • Equipment >
      • Saleae Logic Analyser
      • Rigol DS1102E Oscilloscope
      • XDS110 Debug Probe with EnergyTrace​
      • Segger J-Link Programmer-Debugger
    • The 404 Collection
  • Projects
    • Libraries >
      • Master I²C Software Library
      • Date and Time Library
      • LCD_screen Library Suite
      • Others Libraries
    • smartDevices >
      • I²C smartColours Smart Sensor
      • I²C smartRFID Smart Sensor
      • I²C smartLED Display
      • I²C smartControls Smart Device
      • I²C smartWiFi Smart Device
      • I²C smartBLE Smart Device
      • I²C smartNode Smart Device
    • IoT Projects >
      • Industrial IoT Project
      • Remote Contactless Temperature Monitor
      • Using Node-RED for IIoT
      • Low Power Home Network Weather Monitoring
      • Updated Low Power Home Network Weather Monitoring
      • Weather and Security Station with Blynk
      • SensorTag to Blynk Using Node-RED
      • Pervasive Reporting
    • AI Projects >
      • Colour Recognition with Neural Network
    • Other Projects >
      • Portable Particulate​ Matter Monitor
      • FRAM-based E-Paper Screen Controller
      • General Purpose 3.5" Screen
      • Colour Recognition with Neural Network
      • A Low Power Weather Station
      • Digital Volt-Amp-Watt Meter
      • Mobile Measurement with LCD Display
      • Screen with SRAM for GUI
      • Volt-Amp-Watt-Meter for Grove
      • Multi-Touch Project with CapTIvate

IoT Hub with Temboo

Temboo allows to connect the hardware to many services in the cloud. Each service is managed by a chroreo, which acts as a hub. 

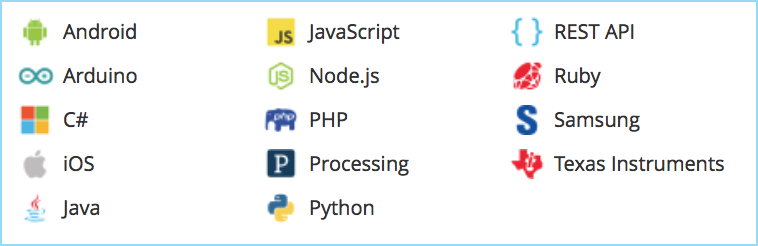
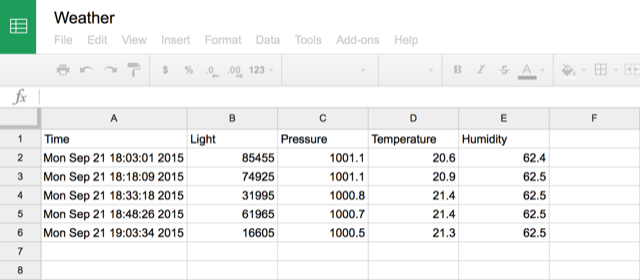
The Temboo library comes packed with the Arduino and Energia IDEs, and supports many more platforms.

For the weather station example, I've followed the example Save LaunchPad data to a Google Spreadsheet. This example uses the Google Spreadsheets AppendRow choreo and a data sheet on Google Docs.b
Picture

Configure

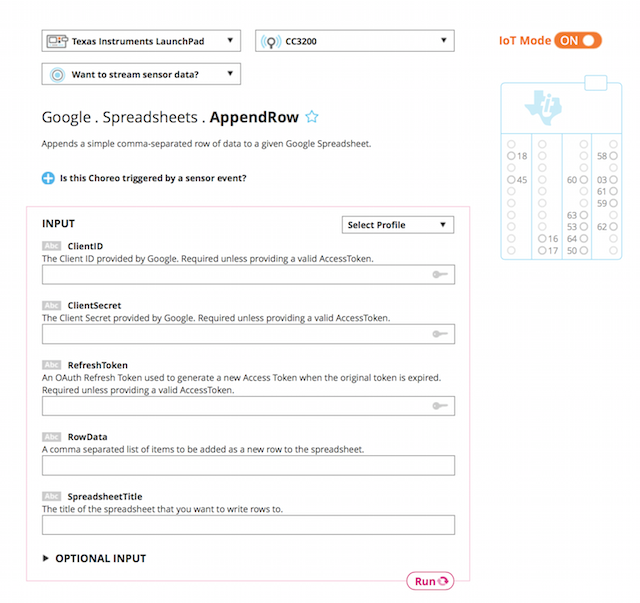
Although Temboo provides step-by-step tutorials specific to each connected service and hardware supported, the configuration includes 11 steps.

  1. Create a Temboo account
  2. Create a Google account
  3. Create a Google project
  4. Add and enable the Google Drive
  5. Create the Google Oauth credentials
  6. Create a spreadsheet
  7. Create a Temboo application
  8. Go through the Temboo InitializeOAuth procedure
  9. Validate the AuthorizationURL on Google
  10. Go through the Temboo FinalizeOAuth procedure
  11. Copy the code for Energia

Each procedure requires inputs and generates output automatically.
Picture
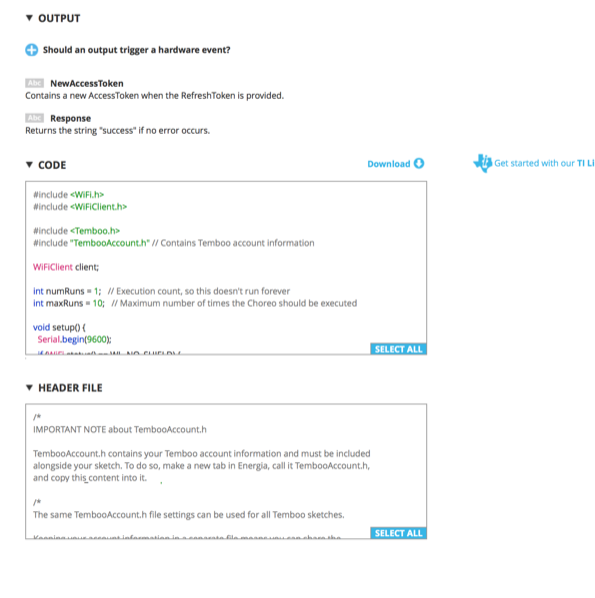
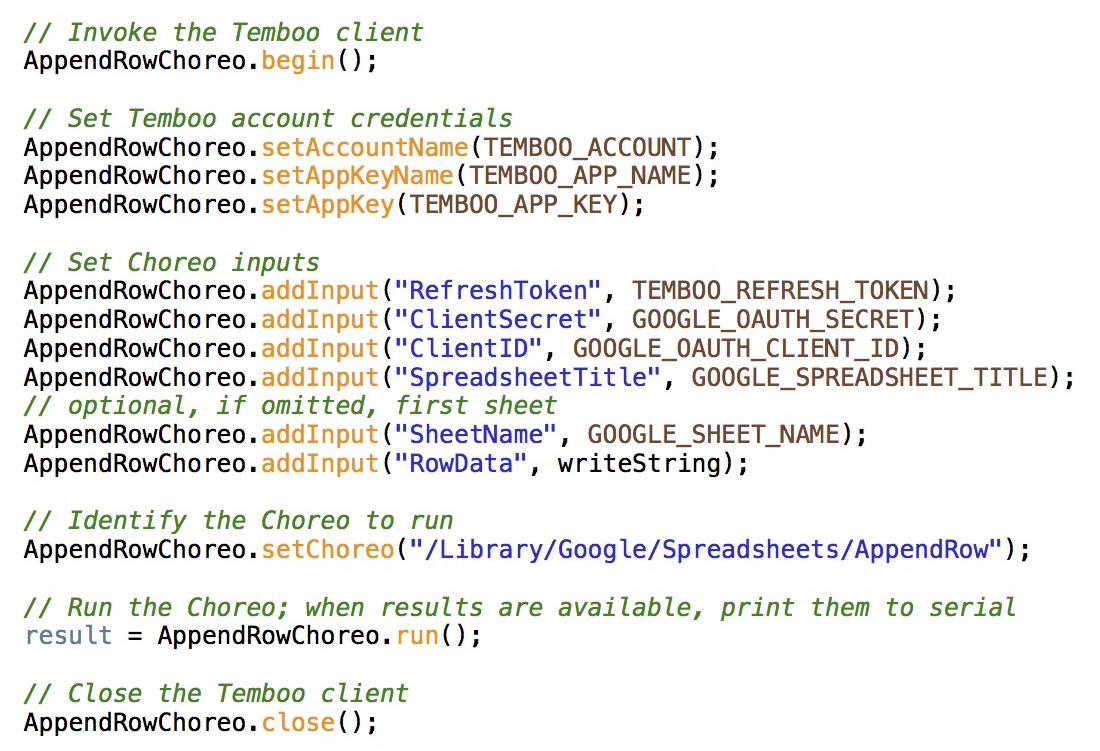
The last step generates the code for Energia with two files: one for the main sketch, another for all the credentials. 

Additional actions can be added to the sketch. For example, data successfully sent turns a LED on pin 17 on.

Picture
Picture
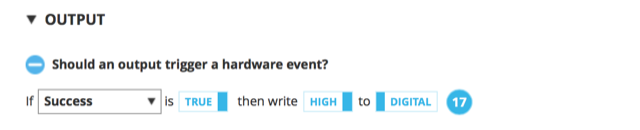
This basic example running on the LaunchPad CC3200 requires no fewer than 8 identifiers and keys!

Tempo includes a dashboard with all the usage metrics as the number of choreos, the number of calls and the size of the data. 

I was surprised by the size of each message: it averages ~20 kB.
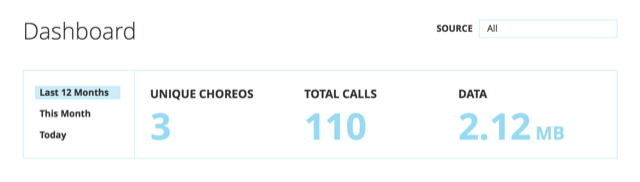
Picture
Picture

Conclusion

Temboo offers a hub to connect virtually anything with everything. 

The standard example I took might not be the right one. Other choreos allow to send an e-mail, create a ticket on a help desk, track a parcel delivery, and much more.

Temboo seems to inherit the complexity from the configuration processes of the services it connects to. Even if the guided procedures for the choreos are of great help, the overhaul solution seems complicated when compared with a more integrated solution.
Picture

Pros

  • Connection to a wide range of services
  • Helpful guided procedures

Cons

  • Complex configuration procedures

Wrap-Up

  • Cloud hub
  • Complex configuration procedures 
  • Helpful guided procedures

Links

  • Temboo website
Picture
Powered by Create your own unique website with customizable templates.