Embedded Computing
  • About
  • Blog
  • Hardware
    • Which Platform?
    • Controller Platforms >
      • Adafruit Platform
      • Arduino Plaform
      • BBC micro:bit
      • Espressif Platform
      • LaunchPad Plaform
      • Raspberry Pi Platform (MCU)
      • Seeeduino Platform
      • Teensy Plaform
    • Computer Platforms >
      • BeagleBone Platform
      • Raspberry Pi Platform (SBC)
      • UDOO Platform
    • Peripherals >
      • BoosterPacks for LaunchPads
      • Shields
      • Grove System
      • Sensors
      • Actuators
    • Displays >
      • E-Paper Displays
      • Reflective Displays
      • TFT Displays
      • LCD Displays
    • Legacy Platforms
  • Software
    • Exploring RTOS with Galaxia >
      • Event Library
      • Semaphore Library
      • Mailbox Library
      • Timer Library
      • Clock Library
      • SWI Library
      • Task Library
    • Ultra-Low Power with EnergyTrace >
      • Ultra-Low Power with MSP430
      • Ultra-Low Power with Energia MT and Galaxia
    • Using Integers Instead of Reals
  • IoT
    • IoT Platforms: Which Hardware?
    • IoT Services: Which Solution? >
      • Recommended IoT Solutions
      • Platform-Specific IoT Solutions
      • Other IoT Solutions
      • Not tested IoT Solutions
      • Notification Solutions
    • Get Date and Time from Internet with NTP
    • Fast and Easy WiFi Connection with QR-Code
  • Tools
    • How to Start?
    • Reference >
      • Asking for Help
      • Boards Pins Maps
      • Ruler
      • Boards and Plugs
      • I²C Logic Level Converter
      • Standards for Connectors
    • Training >
      • Texas Instruments Workshops
      • Embedded Systems: Shape The World — MOOC edX UTAustinX UT.6.02x
      • Embedded Systems - Shape The World: Microcontroller Input/Output — MOOC edX UTAustinX UT.6.10x
      • Embedded Systems - Shape The World: Multi-Threaded Interfacing — MOOC edX UTAustinX UT.6.20x
      • Real-Time Bluetooth Networks: Shape the World — MOOC edX UTAustinX UT.RTBN.12.01x
      • Systems Thinking with Texas Instruments Robotics System Learning Kit
    • Books >
      • Getting Started with the MSP430 LaunchPad
      • Getting Started with Arduino
      • Arduino Cookbook
    • IDE >
      • The Battle of IDEs >
        • Arduino IDE 2.0
      • More Options
      • Assessing the Next Generation of IDEs
      • Tools for Documentation
    • Equipment >
      • Saleae Logic Analyser
      • Rigol DS1102E Oscilloscope
      • XDS110 Debug Probe with EnergyTrace​
      • Segger J-Link Programmer-Debugger
      • Nordic Power Profiler Kit II
  • Projects
    • Libraries >
      • Master I²C Software Library
      • Date and Time Library
      • highView Library Suite
      • Others Libraries
    • smartDevices >
      • I²C smartColours Smart Sensor
      • I²C smartRFID Smart Sensor
      • I²C smartLED Display
      • I²C smartControls Smart Device
      • I²C smartWiFi Smart Device
      • I²C smartBLE Smart Device
      • I²C smartNode Smart Device
    • IoT Projects >
      • Remote e-Paper Pictures Panel
      • Remote e-Paper Messages Panel
      • Industrial IoT Project
      • Remote Contactless Temperature Monitor
      • Using Node-RED for IIoT
      • Low Power Home Network Weather Monitoring
      • Updated Low Power Home Network Weather Monitoring
      • Weather and Security Station with Blynk
      • SensorTag to Blynk Using Node-RED
      • Pervasive Reporting
    • AI Projects >
      • Colour Recognition with Neural Network
    • Other Projects >
      • Driving a Large E-Paper Display with a Compact Xiao RP2040
      • Low-Power E-Paper Weather Station
      • Portable Particulate​ Matter Monitor
      • FRAM-based E-Paper Screen Controller
      • General Purpose 3.5" Screen
      • Colour Recognition with Neural Network
      • A Low Power Weather Station
      • Digital Volt-Amp-Watt Meter
      • Mobile Measurement with LCD Display
      • Screen with SRAM for GUI
      • Volt-Amp-Watt-Meter for Grove
      • Multi-Touch Project with CapTIvate

chipKIT PGM Programmer-Debugger

Debugging is key for identifying and fixing issues. Unfortunately, most of the Arduino-like boards only feature a very rudimentary way of debugging, using a serial console.
Serial.print();

Only two platforms feature a hardware debugger: 
  • Texas Instruments includes a built-in debugger in all the LaunchPad boards, 
  • and chipKIT proposes the optional chipKIT PGM programmer-debugger for the chipKIT boards, like the chipKIT Uno32.
 
Picture

Hardware

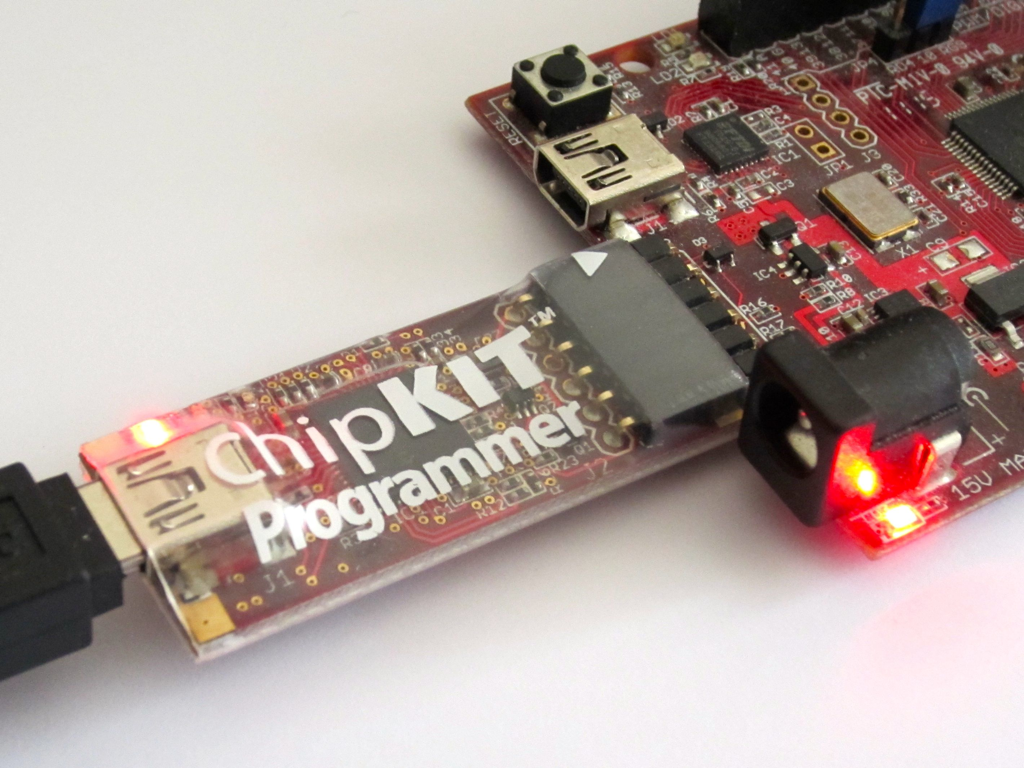
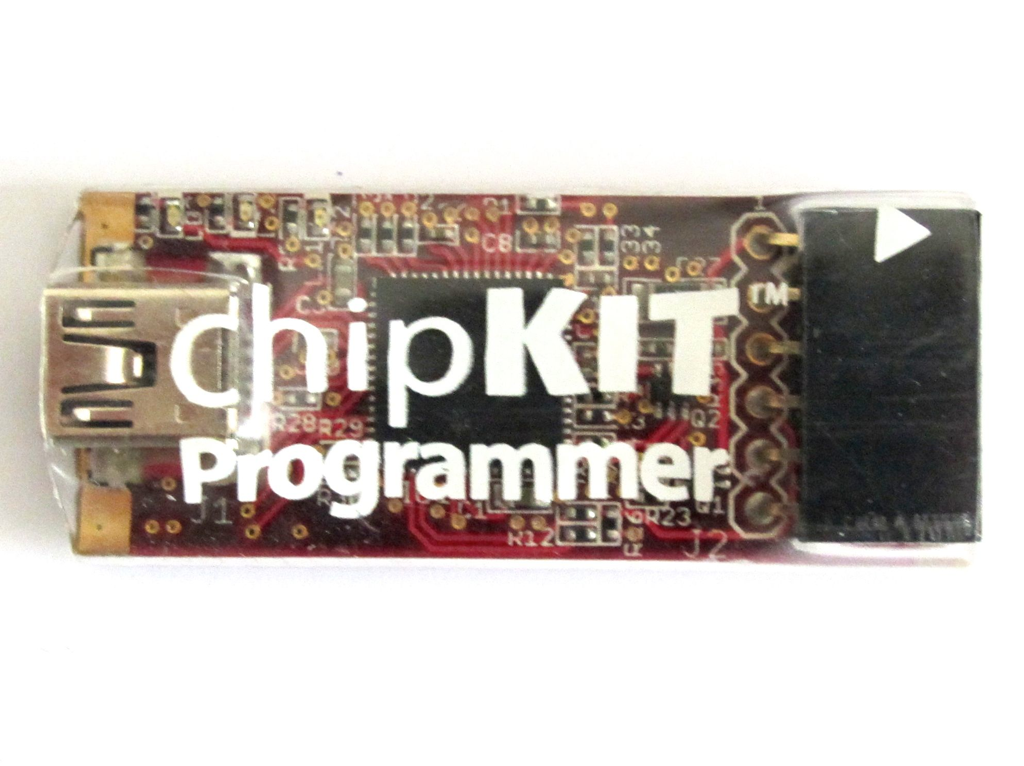
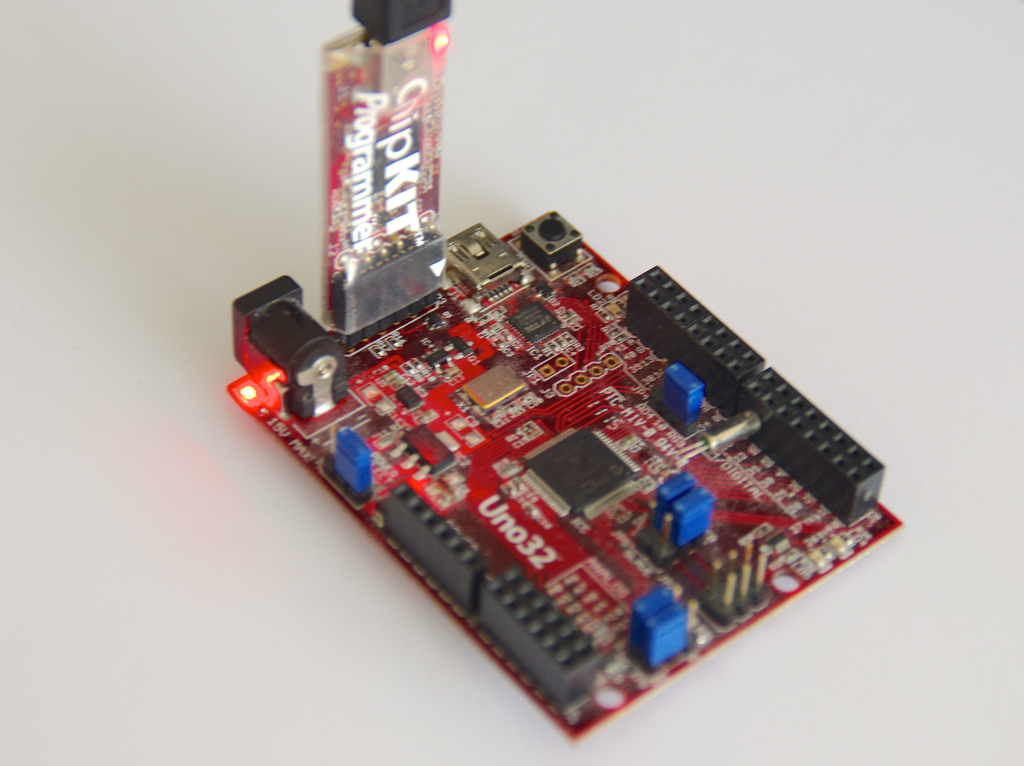
The programmer-debugger comes protected under a transparent plastic. The front has three LEDs for power, activity and status.
Picture
Picture
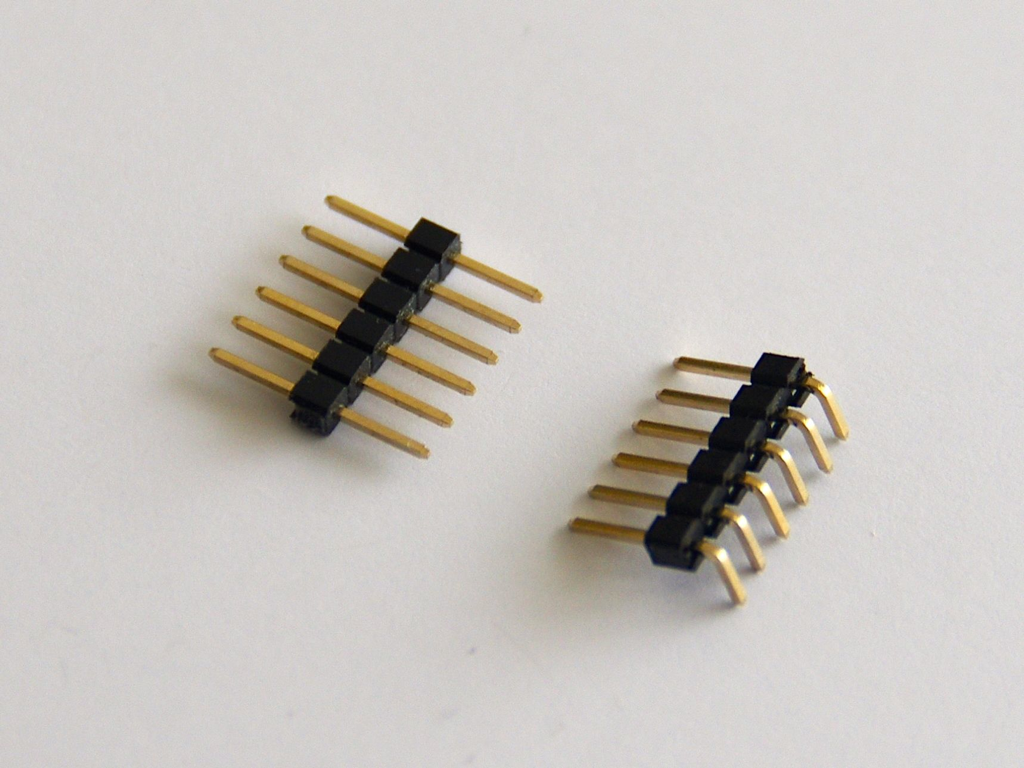
The chipKIT PGM programmer-debugger comes with right-angled headers to fit into the connector of the board. 

However, the supplied headers weren't strong enough, resulting in frequent losses of contact and thus disconnections of the board. 
 
Picture
I fixed this using straight headers: the debugger is then placed vertically, saving space on the bench as an additional benefit.
Picture

Software

On the software side, there are multiple options.

MPLABX is the official IDE from Microchip, based on NetBeans and available for Windows, Linux and Mac OS X. MPLABX has a free version. The C++ compiler, also free, needs to be downloaded and installed separately.

The debugger is tightly integrated into the IDE. However, this IDE doesn't feature the Wiring-Arduino based framework.

Picture
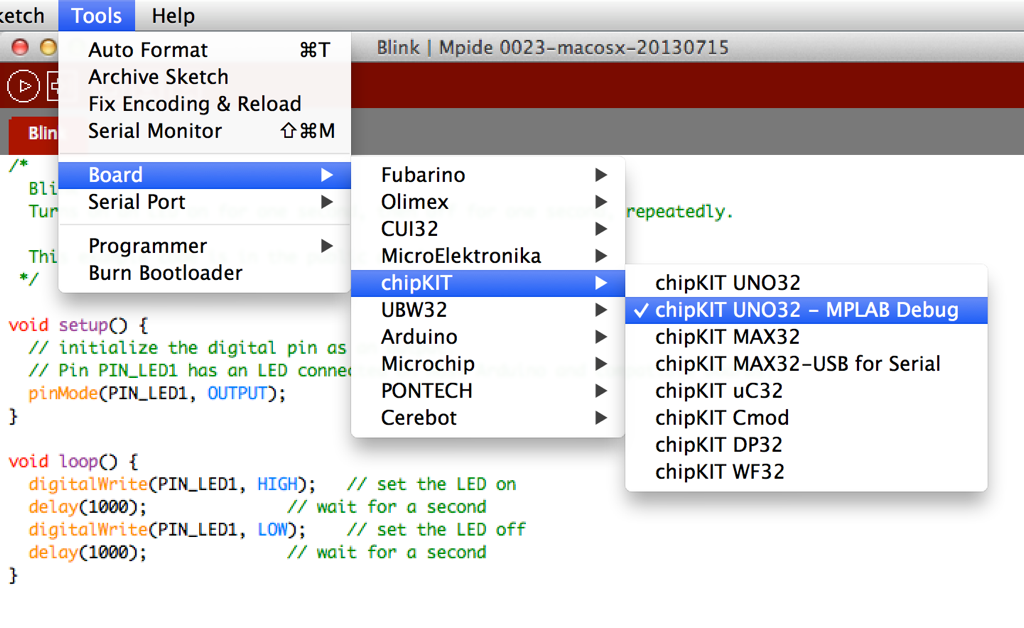
To play with the Wiring-Arduino framework, the recommended IDE is MPIDE. Using MPIDE with the programmer-debugger is also possible, but with the need of selecting specific targets to compile. 

The standard configuration for MPIDE relies on a boot-loader in ROM. This boot-loader works with the FTDI chip to upload the sketch from USB into flash and establish a serial connection.

The programmer operates in a different way, as it writes directly to the flash. As a consequence, the boot-loader is erased. Because the memory allocations are different, a specific target is required. 

This is done by selecting  a dedicated board, here chipKIT UNO32 — MPLAB Debug, instead of the standard chipKIT UNO32.

Check that MPIDE includes the pull request #459, which includes fixes for the chipKIT Uno32 board without boot-loader. 

Picture
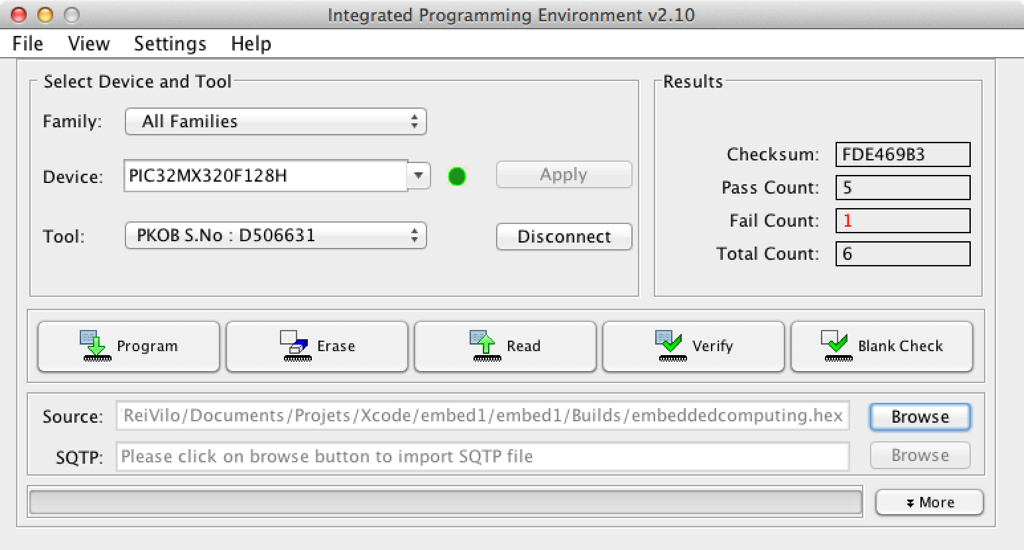
Once the executable is ready, use the Integrated Programming Environment utility to program the board.

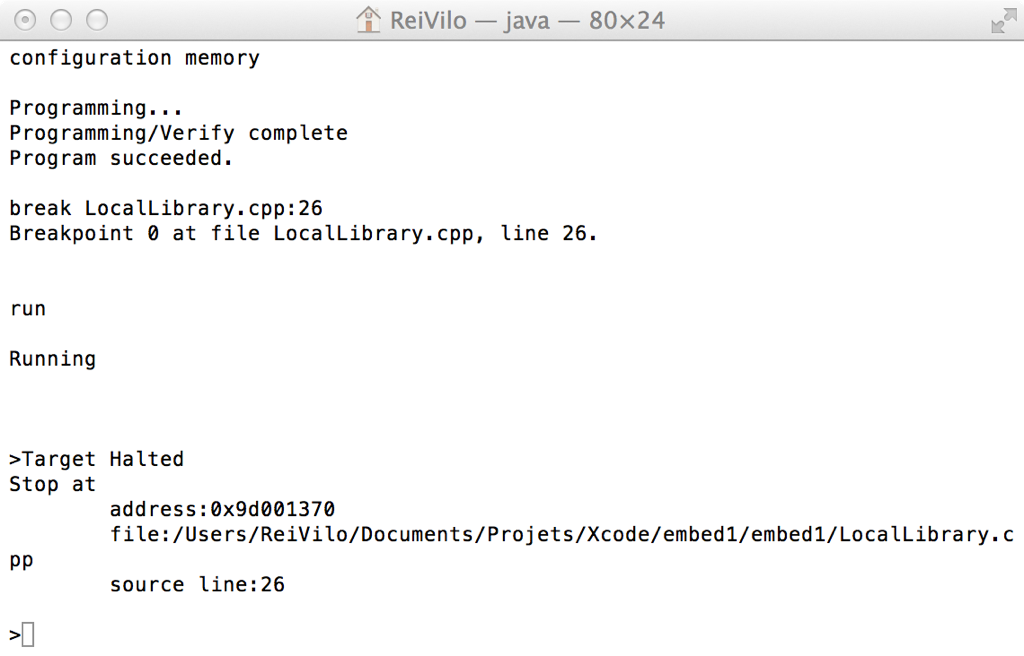
As an alternative, the MDB command-line utility programs the board and launches a debugging session.


Picture
The Debug target first compiles the sketch, then uploads it with all the breakpoints, and finally launches a debugging session into a Terminal window.

Here, the sketch stops at line 26 defined previously.
Picture
I've also investigated the eJTAGproxy driver that brings GDB compatibility but didn't manage to get it work.

Conclusion

At USD27, the programmer-debugger is an affordable solution to ease the development of large projects.

It delivers its full potential with the MPLABX IDE from Microchip.

Pros

  • Designed for the chipKIT boards
  • Affordable
  • Works with multiple IDEs

Cons

  • Proprietary debugging software

Wrap-Up

  • A nice addition for the chipKIT boards
  • Affordable

  • Hardware
  • Microchip MPLABX
  • MPIDE
  • Webinar on MDB
  • embedXcode
Picture
Picture
Powered by Create your own unique website with customizable templates.